
|
Gardening Month by Month by Chris Petersen |
|
|
March 2024 JUMP START YOUR GARDENING SEASON! Try Starting Seeds Indoors! |
I have to admit that I was not very successful with seed starting at first. My dad always grew the greatest tomato seedlings on a table in front of a south facing window. He used old yogurt cups and other recycled containers nestled in reused aluminum foil pans! It wasn’t fancy, but it worked!
The most important thing I learned about seed starting is timing! Seed packets indicate how many weeks before your last frost date your seed should be planted indoors. To know when to plant each cultivar you count back by weeks from that date (April 19th for Asharoken). If you start your seeds too early, they will get leggy and outgrow their space! The next most important consideration is light. I use shelving in front of my windows and LED light strips retro-fitted into a baker’s rack. I put the lights on inexpensive timers. Lastly, I read everything that I could about the plants that I wanted to grow.
Supplies needed: Seed starting mix, seed starting kit with cells, leak-proof tray and dome, fine vermiculite, plant tags, paint pen, spray bottle, seeds
Directions:
Moisten the seed-starting mix with warm water until it is thoroughly moistened. Fill the seed cells to the top with seed starting mix, tapping them firmly against the table to settle the mix and remove air pockets. Make a shallow hole in each cell using your finger or a pencil and follow the directions for seed planting depth on the seed packet. Drop 1 or 2 seeds into each hole; then, cover the seeds with a light dusting of fine vermiculite or seed-starting mix. Be careful not to bury the seeds too deeply. Put labels in the cells with the variety name and date. Mist the cells lightly with water and cover the tray with the clear dome lid or plastic wrap. Place the tray in a spot with bright natural light or under artificial lights. The distance from the lights will depend on the type of lighting used. Seedlings need 14 to 16 hours of light per day.
Keep the soil slightly moist. Check the tray daily and once 50-75% of the seeds have sprouted, remove the dome lid. Moving air will create stronger seedlings, so place a fan nearby. When two true leaves are present, you may water with 1/4 strength fertilizer.
After all danger of frost has passed, begin transitioning the plants outside. It’s important to harden off young plants before planting them in the garden to prevent shocking them due to light and temperature changes. Set the tray in a sheltered, shaded spot outside, increasing the amount of time outdoors each day, starting with 2 to 3 hours. Then, increase the time and light slowly over the course of a week or so, at which point seedlings can remain outside.
January / February 2024
Houseplants/ Indoor Gardening
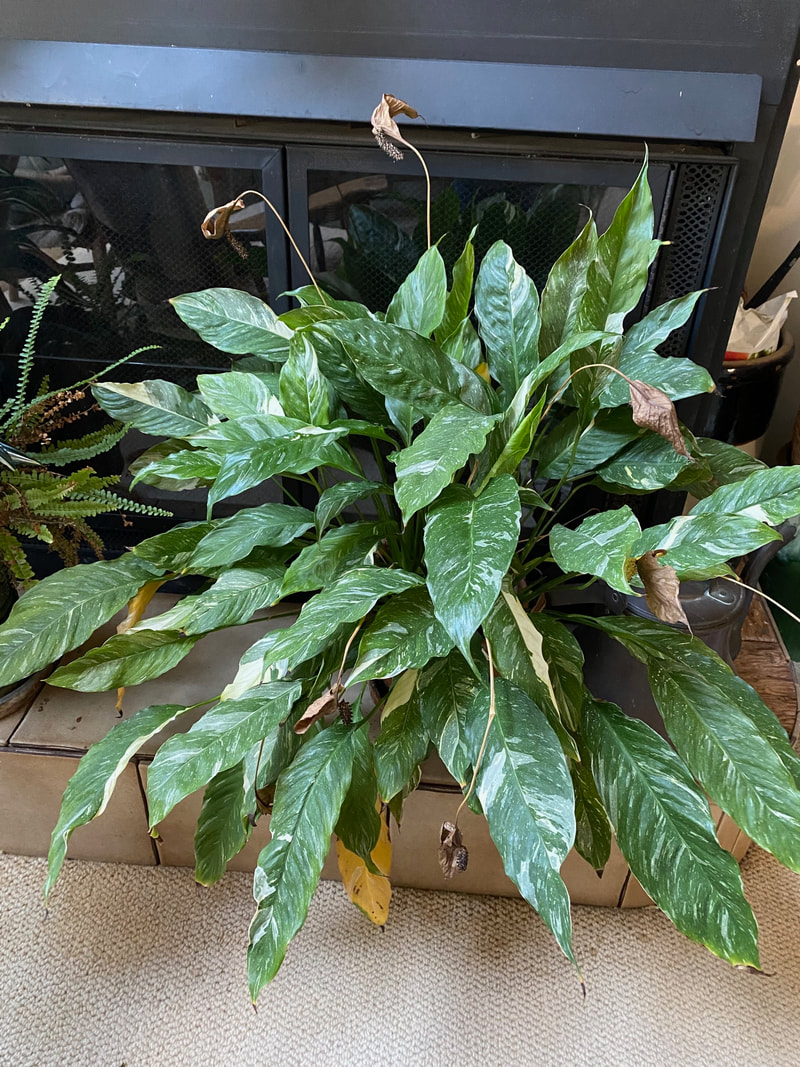
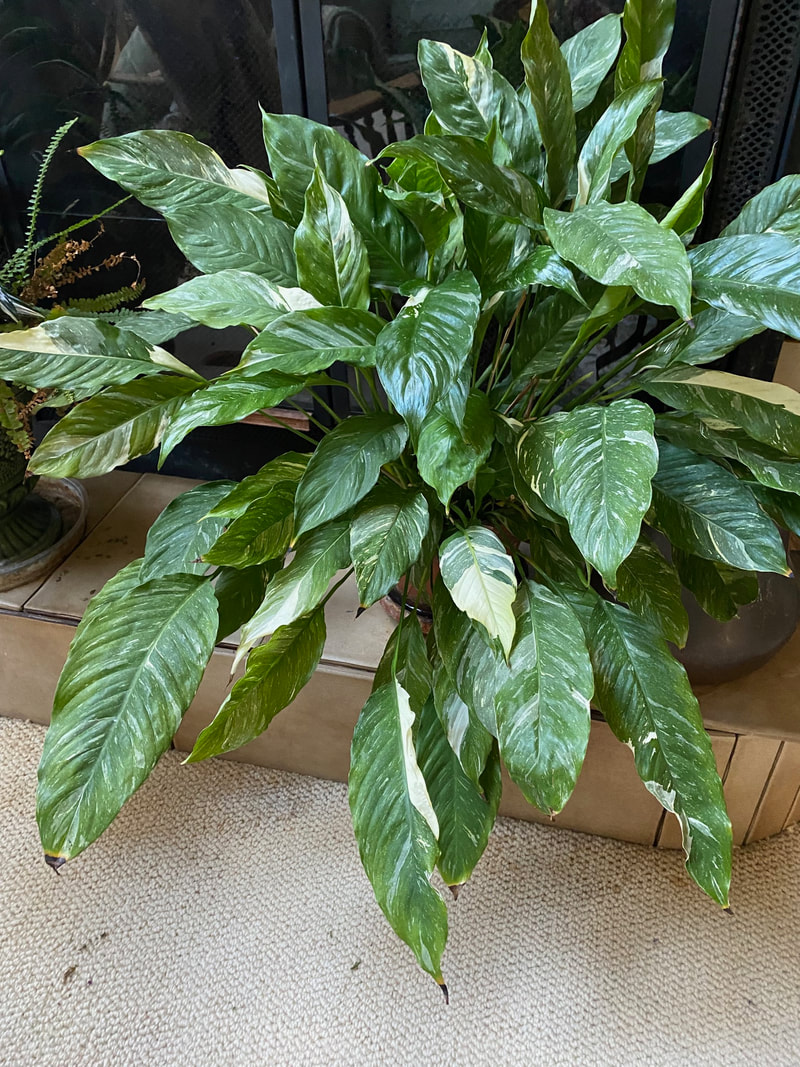
Remove yellowing foliage, dead foliage and spent flowers regularly from plants.
Remove yellowing foliage, dead foliage and spent flowers regularly from plants.
- Provide houseplants with adequate sunlight or artificial light.
- Rotate houseplants to keep them lush on all sides.
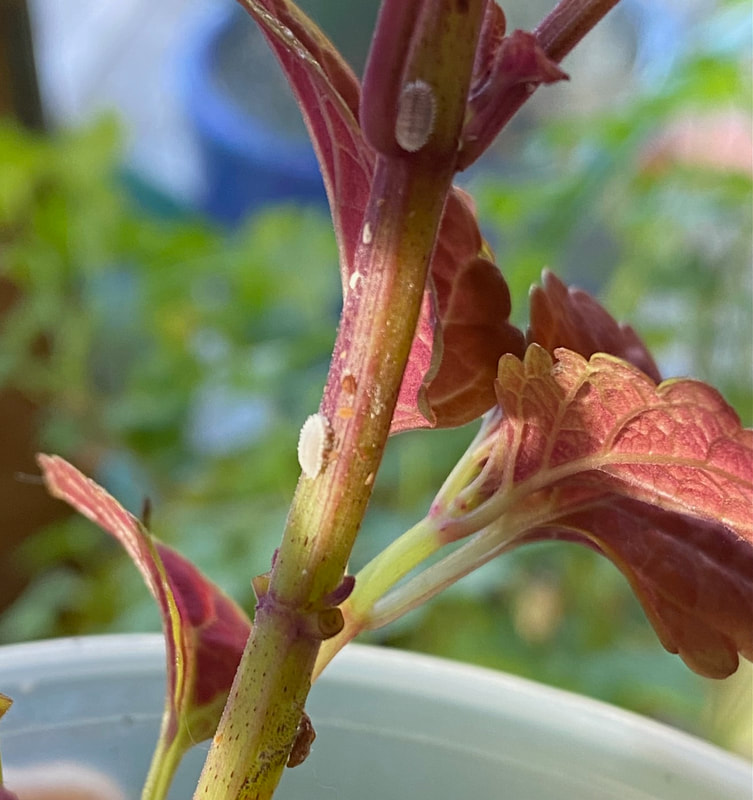
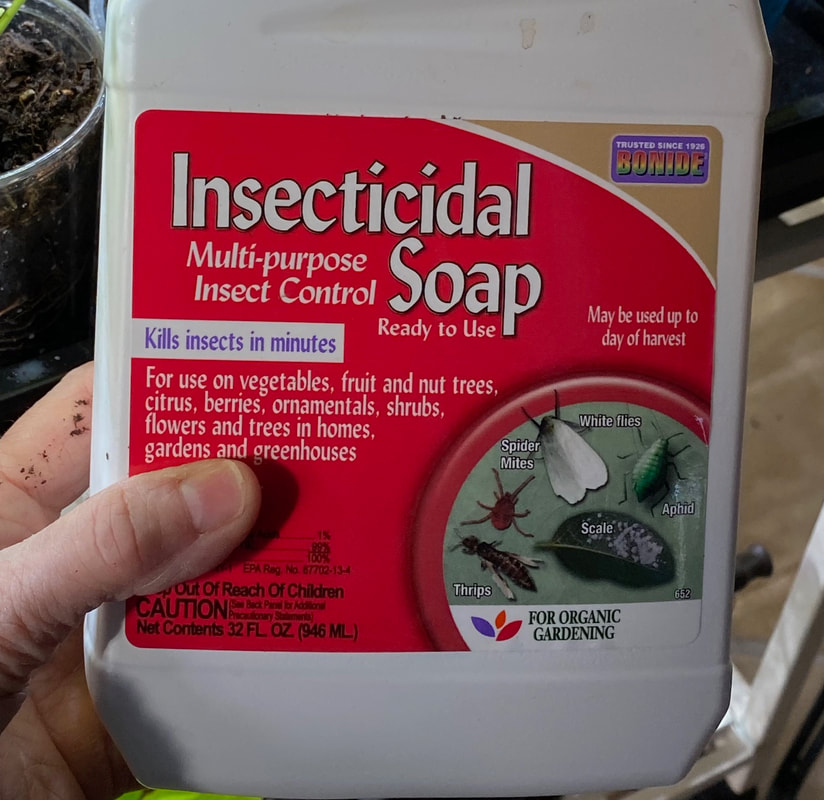
- Check plants for signs of insects and treat accordingly. Cottony mealy bugs can be killed by touching the pest with a cotton swab dipped in rubbing alcohol. Also, insecticidal soap or Neem oil sprays can be applied to most houseplants for the control of other pests such as spider mites.
- Keep a fan running near your houseplants to provide good air circulation.
- Give your houseplants more humidity by placing them on trays filled with pebbles and water. Pots should sit on the pebbles, not in the water.
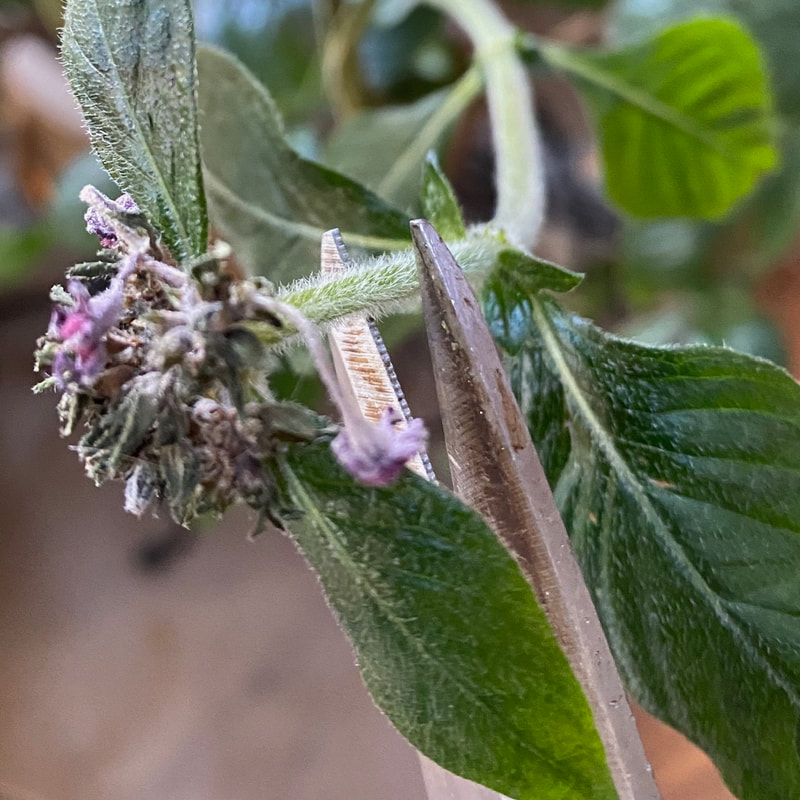
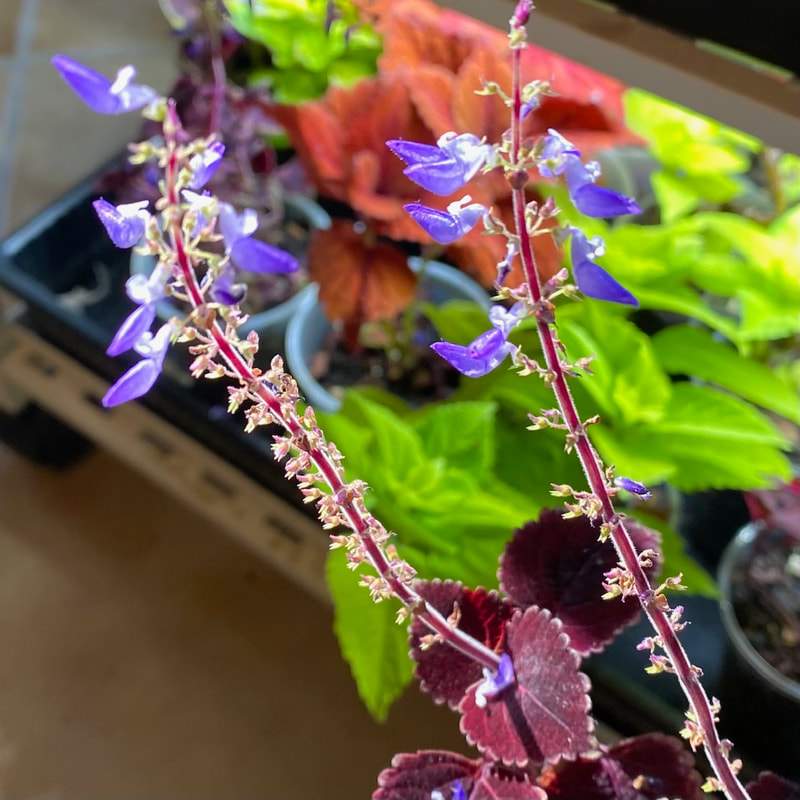
- Pinch back annuals and tropical plants overwintering indoors to create bushier plants.
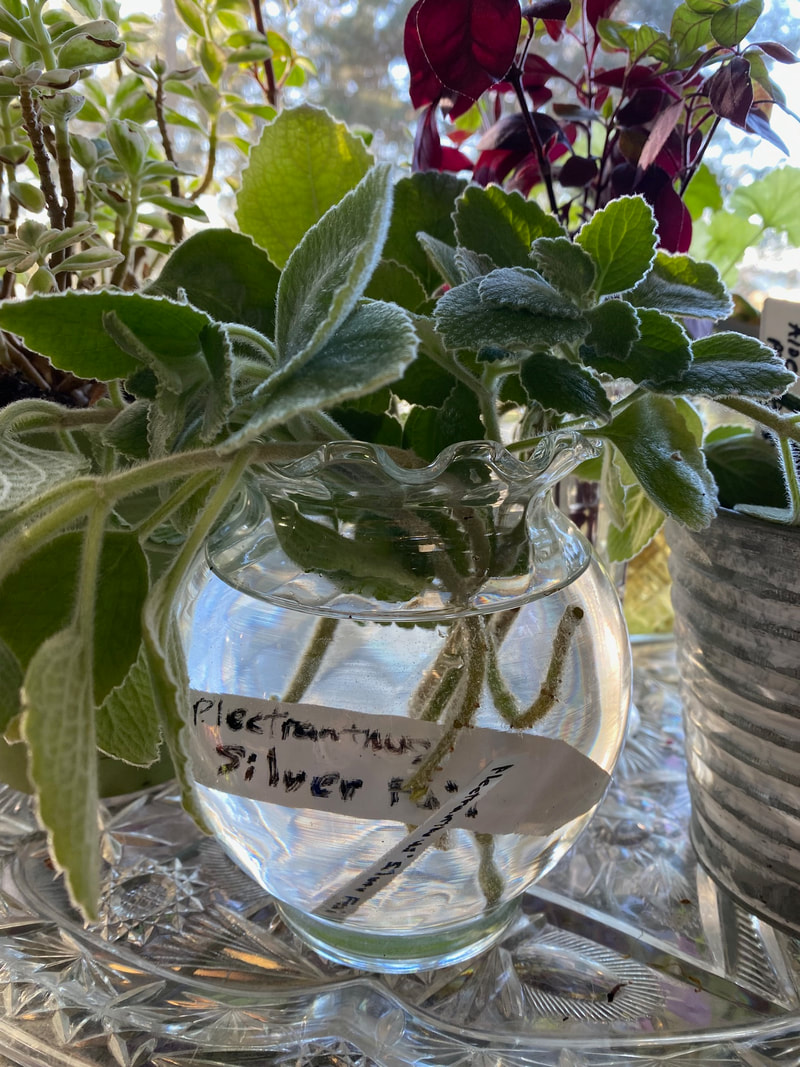
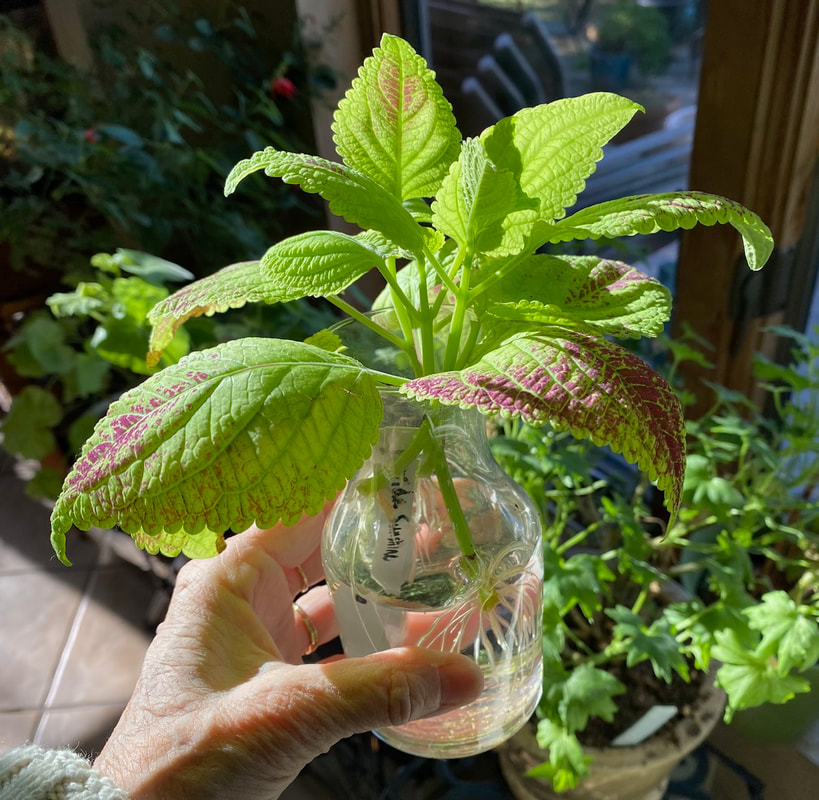
- Trim leggy hanging baskets and use the cuttings to make new plants.
- Repot root-bound plants. If plants are drying out too quickly, this may be a sign that the plant needs to be root pruned and repotted.
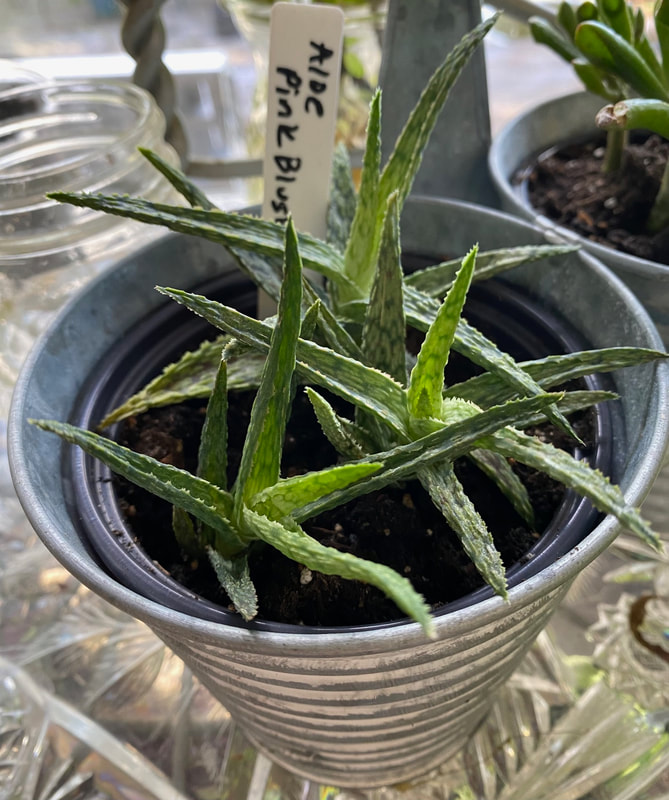
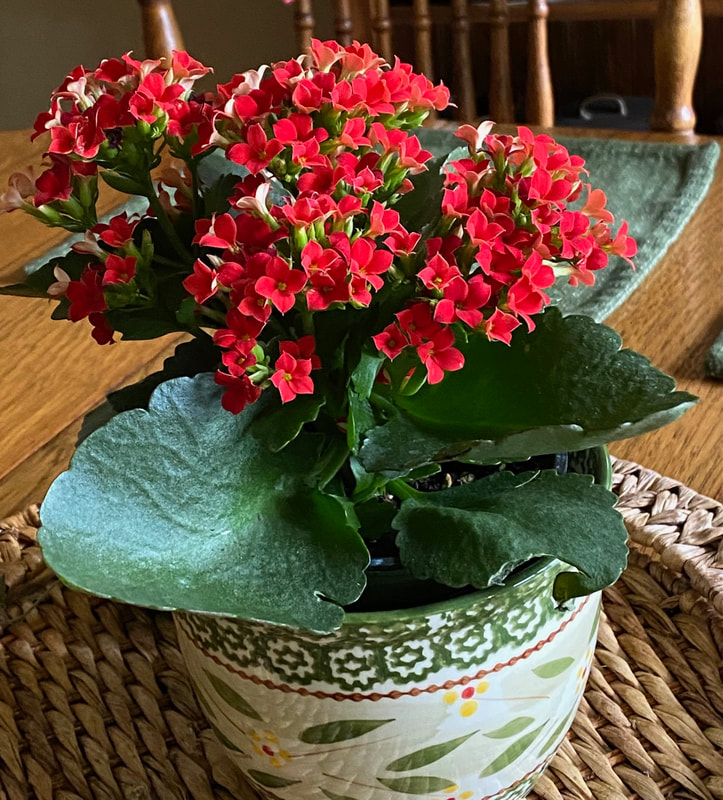
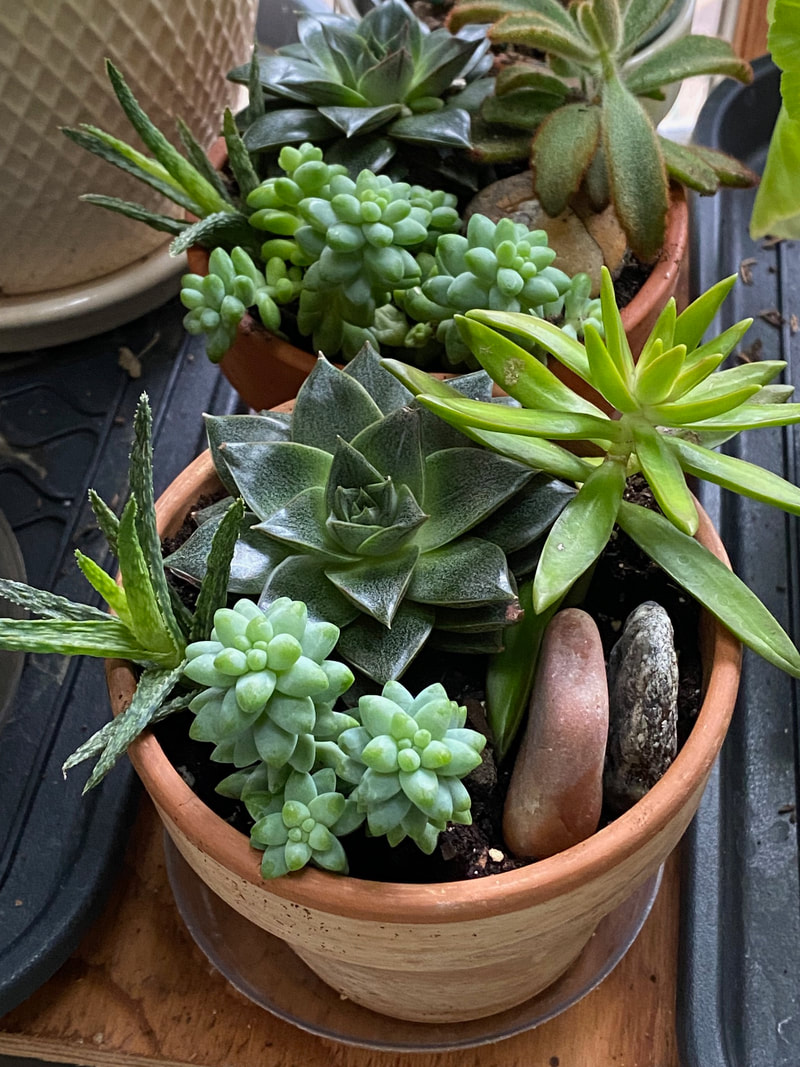
- Divide succulent offshoots or “pups” on plants such as aloe, haworthia, echeveria, kalanchoe, crassula, sedum and sempervivum and pot them up.
- Add fresh soil to pots where needed.
- Clean the foliage on your houseplants by dusting, misting or a warm water bath.
- Holiday poinsettia plants do best with sun for at least half the day and night.
- Discard dead or dying houseplants.
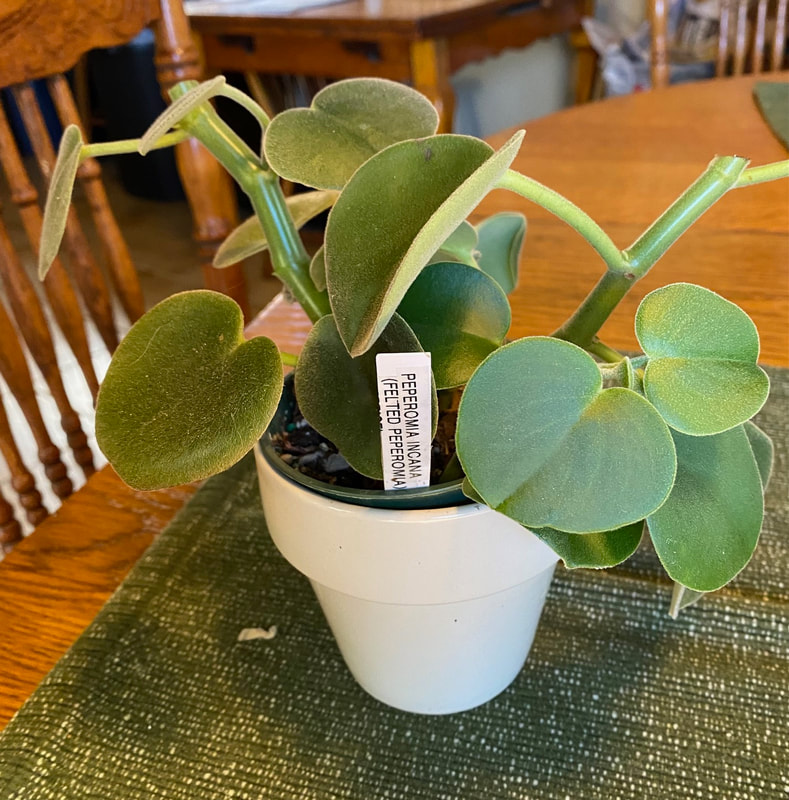
- Refresh your collection by purchasing a few new plants, creating a dish garden or terrarium, or relocating plants to where you will enjoy them the most.


Seed Starting
Sign up for catalogs online if your mailbox isn’t already overflowing! Don’t wait to place orders for your favorite seeds as they often sell out!
Recommended Sources for Seeds
Sign up for catalogs online if your mailbox isn’t already overflowing! Don’t wait to place orders for your favorite seeds as they often sell out!
Recommended Sources for Seeds
- Annie’s Annuals & Perennials www.anniesannuals.com
(Specializes in rare and unusual plants) - Baker Creek Heirloom Seeds www.rareseeds.com/
(Heirloom and exotic vegetable seeds, free shipping) - Burpee www.Burpee.com
- Floret www.floretflowers.com
- (Unique, uncommon and heirloom flowers for cutting. Website has good information.)
- Johnny’s Selected Seeds www.johnnyseeds.com
(Sells seeds for fruits, vegetables, flowers and herbs, offers certified organic seed options) - Park Seed www.parkseed.com
- Prairie Moon Nursery www.prairiemoon.com
(Plants, seed mixes and information for all types of native plantings and restoration)
December 2023
Forcing Amaryllis Bulbs
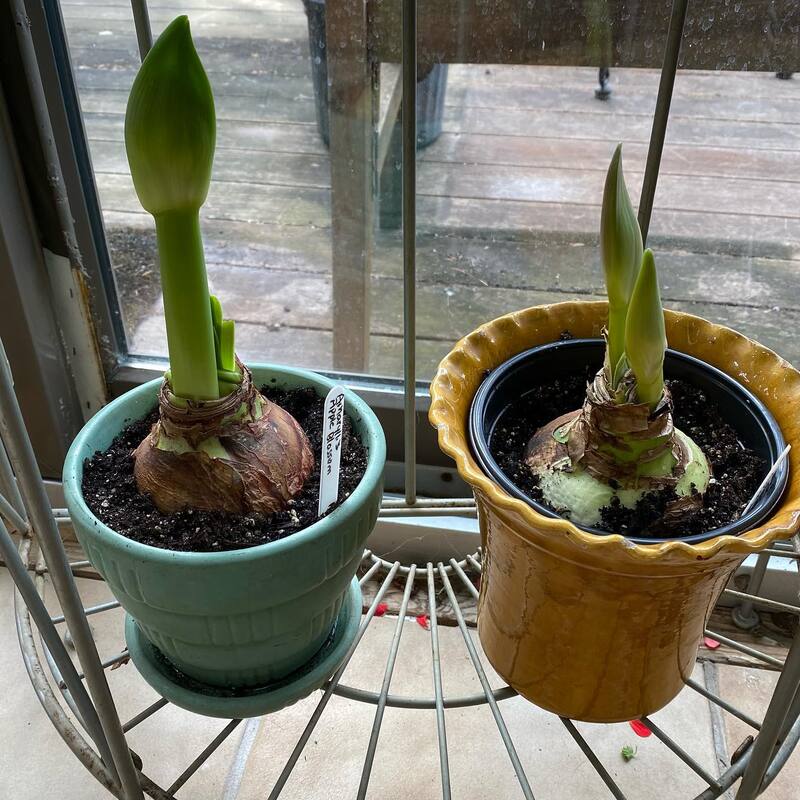
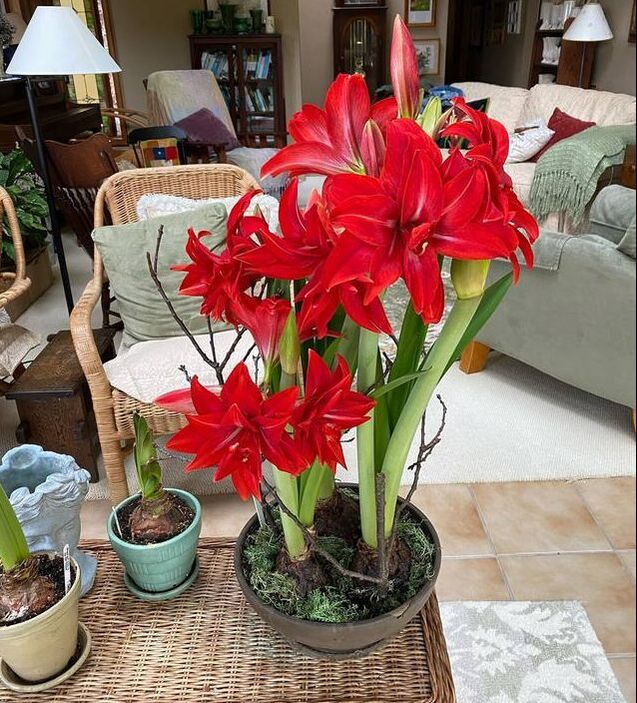
I was late putting my amaryllis plants out for the summer last year, so I didn’t put them to sleep for their dormancy period until October. So, I decided to purchase some new bulbs to ensure I’d have bloom that winter. I found a decent sized bulb of ‘Apple Blossom’ at Home Depot. I could see that a bud had formed with the possibility of a second bud next to it. Inspect your amaryllis bulbs before you purchase them to find the biggest bulbs you can.
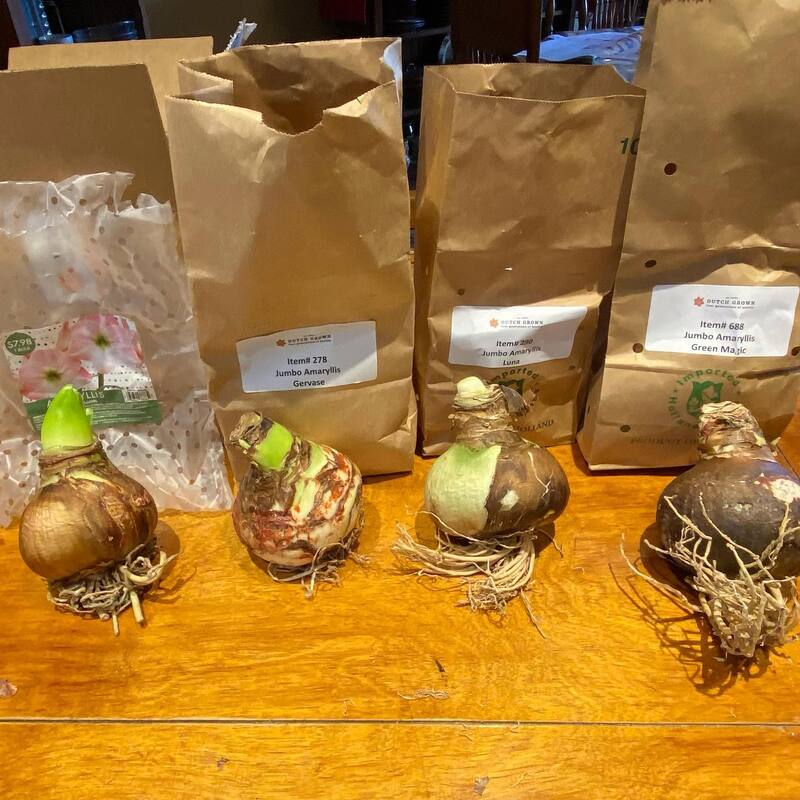
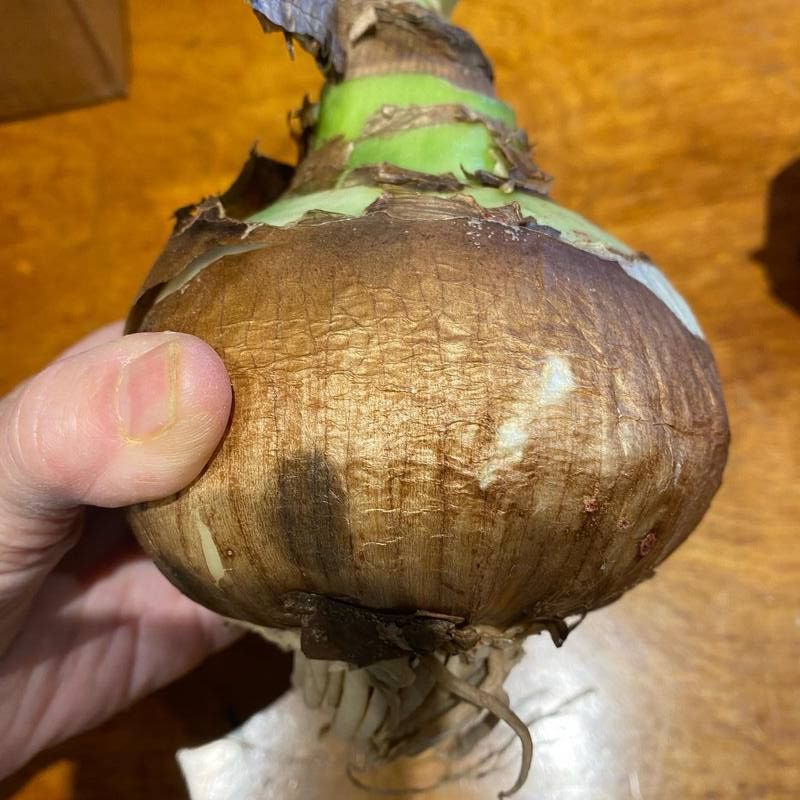
Last year, I looked for sales on jumbo amaryllis bulbs on the internet. I found the best way to get interesting varieties of amaryllis is to order them online. I purchased ‘Luna’ (white), ‘Magic Green’ and ‘Gervase’ (a bright pink). The jumbo sized bulbs were quite a bit larger than the bulbs I bought at the box store. You can see by the pictures that I couldn’t stretch my hand around one of the jumbo bulbs, but I could get my hand halfway around the smaller bulb.
I planted the bulbs up to their “shoulders” in pots that had some heft because the flower stalks can become quite heavy. Later, I added some plant supports such as branches or bamboo stakes. I watered in the bulbs and then placed them in good light in a warm environment. In short order, flower buds appeared and the flower stems began growing, at which time I placed them in very bright light in front of a window where there was space for them to grow.
I had a nice succession of amaryllis blooms over a few months in the winter and early spring. The bulbs that I brought inside after their summer vacation this year have been placed in a dark space and are taking a rest. When they show any signs of regrowth, I’ll pot them up and bring them out of dormancy.
Give it a try!
|
|
|
November 2023
Bulb Planting the Easy Way!
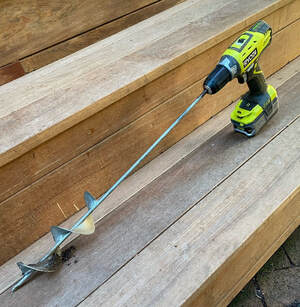
It’s time to get your “driveway plant nursery” and fall bulbs into the ground! Bulb planting is so much easier if you invest in a plant auger that attaches to a cordless drill. The auger has a rotating screw blade that cuts through soil and lifts it up and out of the hole. It’s simple to make holes between closely planted perennials, since you don’t have to dig a full shovel’s width of dirt. Plant augers come in a variety of dimensions (lengths and widths) depending on what you are planting, i.e. bulbs or landscape plants. Longer drill bits, with a length of 30” or more you will allow the gardener to stand up while making holes. The 3”- 4″ wide auger is more than wide enough to dig holes for bulb planting.
It is recommended that you use a cordless drill with your auger. Read the manual before beginning your project! For more stability when drilling, attach a separate side handle. Run the drill on low speed (# 1) and the lowest torque speed (# 1). Never put the drill on the “drill” setting! Install the bit with the battery out for safety. Attach the auger bit and make sure the drill is in the forward direction.
Hold the drill with two hands. As you work, don't dig too deeply at once. Raise the torque speed until drilling the hole is efficient and comfortable for your arm strength. Lift the auger up and down as you drill. If it jams, for example when tangled in roots, you just reverse the direction. If the drill is not on the right setting or if it jams, it has the possibility of twisting your wrist. The side handle lowers the chance of this happening. So, proceed slowly until you get the hang of it.
One source of plant augers is Power Planter: https://powerplanter.com/drills-and-augers/gardening-augers/. The Laura Edition 3” x 36” comes highly recommended.
My auger has absolutely changed bulb planting for me! I also use it for small perennial and annual starts. Give it a try!
See a short video demonstration here: plant_auger.mov
October 2023
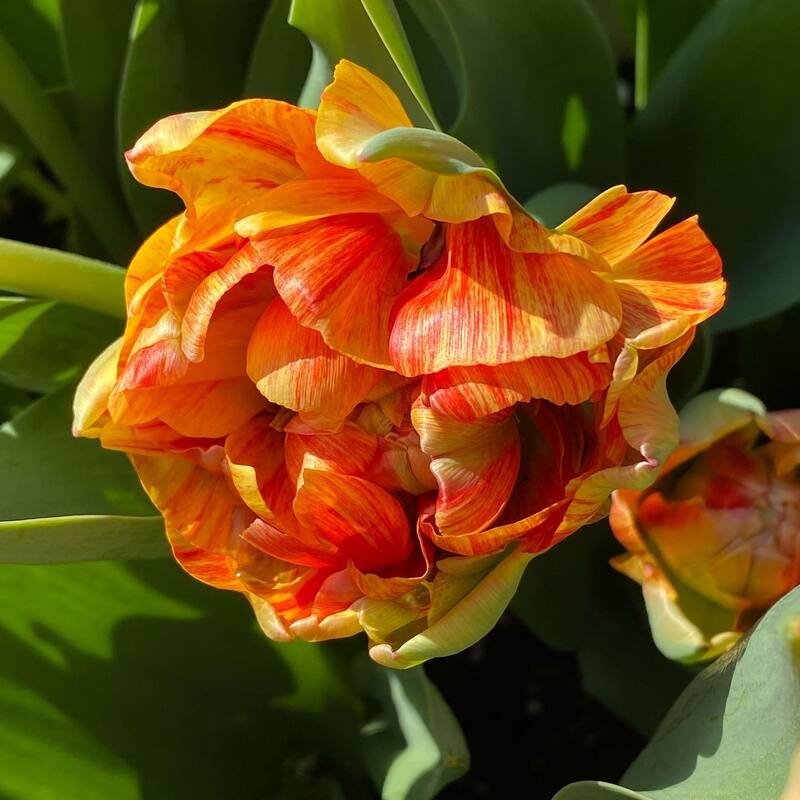
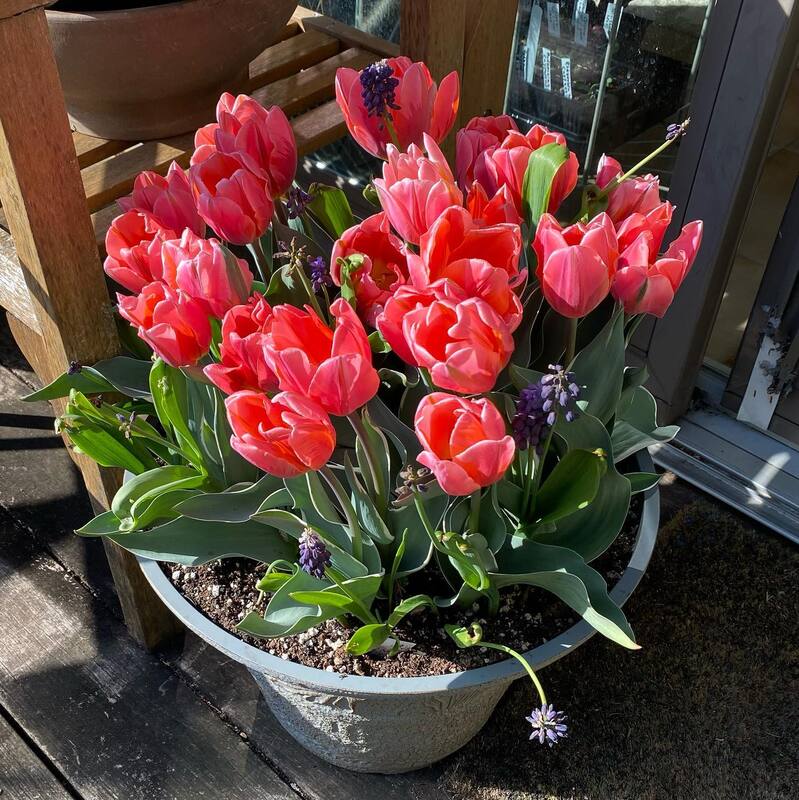
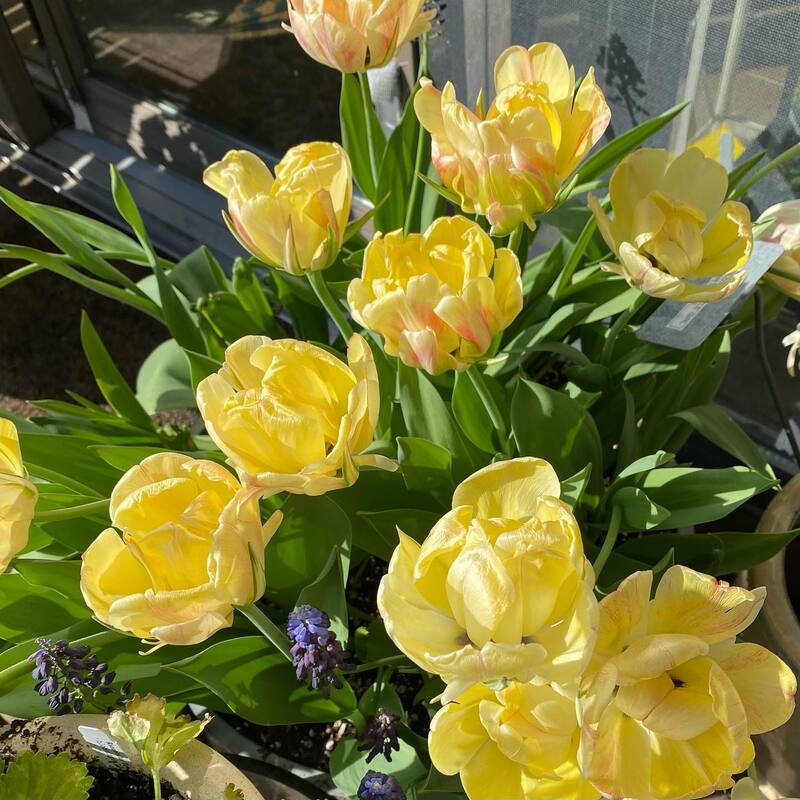
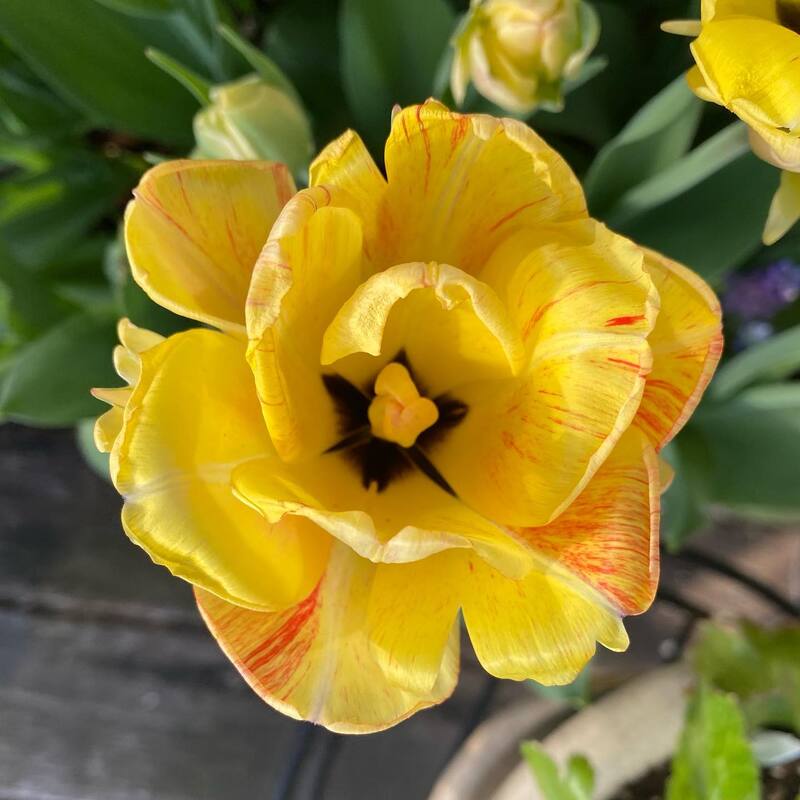
Planting Tulips in Containers
If you haven’t ordered any bulbs, you better hurry! Actually some bulbs will be heavily discounted in October. Alternately, you can look for bulbs in big box stores, local nurseries and even supermarkets!
All my bulbs are planted in the ground or in containers! Daffodils, hyacinths, muscari, alliums and striped squill will be planted when they arrive late this month. I only ordered a dozen Ilium varieties this fall as I’m running out of planting space in my beds!
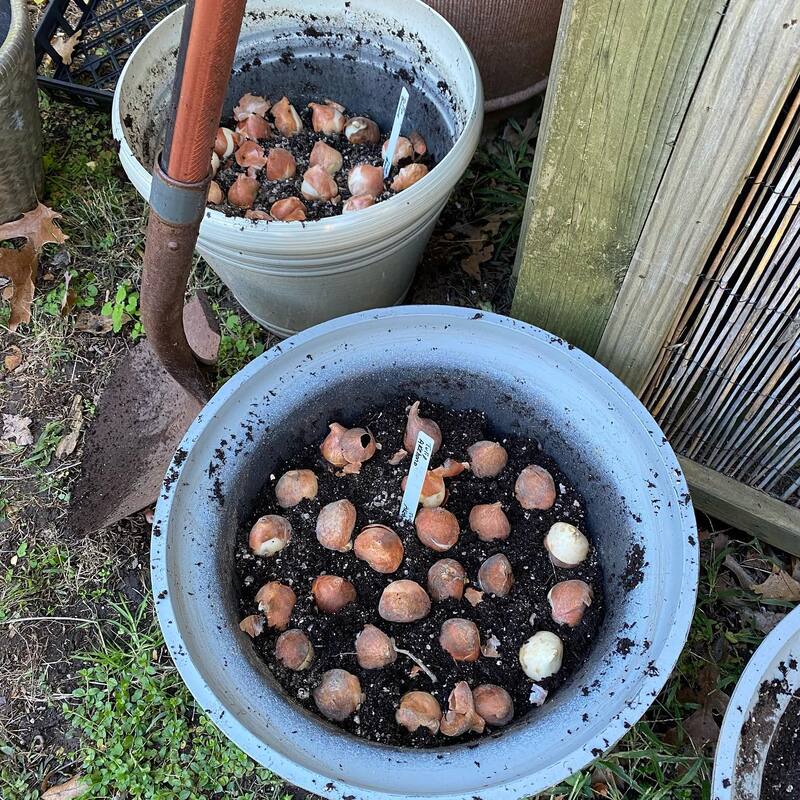
Some tulips that I dug out of my spring containers will be planted in my fenced in area where they will be protected from the deer and rabbits! All the rest of the tulips will be planted in large decorative pots. I fill the containers about halfway with soilless mix and place 25 bulbs close together as pictured. I have a bale of growers mix set on a concrete “table” (actually it was the base of an old air conditioner). I slit the bale in such a way that I can scoop the mix right into any pot that is placed beneath the open end.
All my bulbs are planted in the ground or in containers! Daffodils, hyacinths, muscari, alliums and striped squill will be planted when they arrive late this month. I only ordered a dozen Ilium varieties this fall as I’m running out of planting space in my beds!
Some tulips that I dug out of my spring containers will be planted in my fenced in area where they will be protected from the deer and rabbits! All the rest of the tulips will be planted in large decorative pots. I fill the containers about halfway with soilless mix and place 25 bulbs close together as pictured. I have a bale of growers mix set on a concrete “table” (actually it was the base of an old air conditioner). I slit the bale in such a way that I can scoop the mix right into any pot that is placed beneath the open end.
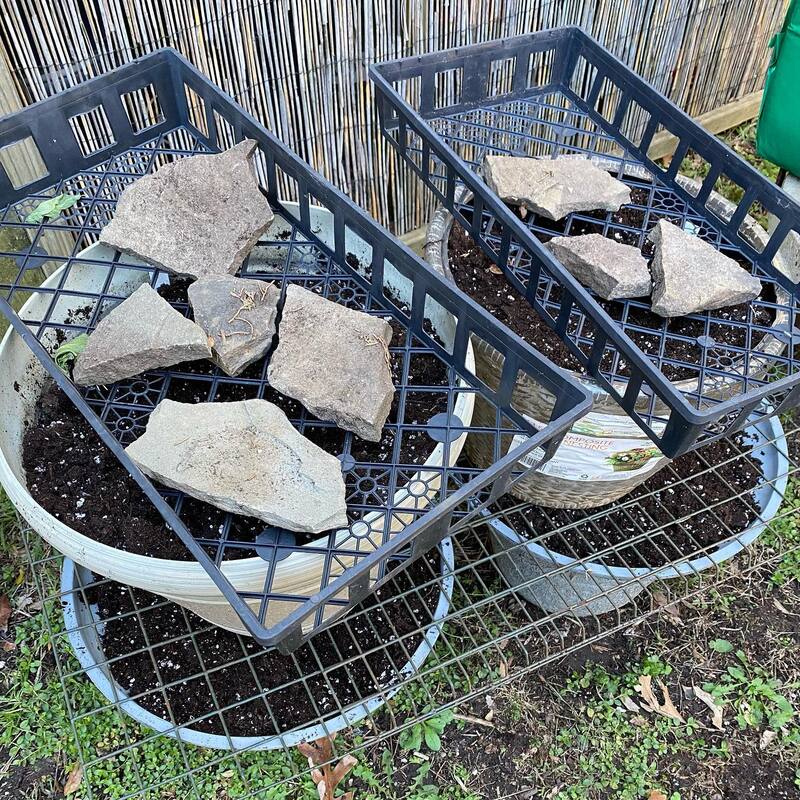
After the containers are watered, the pots will be stored in my shed for the winter. I’ve used mesh to make them secure from hungry squirrels until I can make some room in my shed and get help moving them. I usually throw a piece of cardboard on top of the pot. I may or may not water the pots once during the winter if they feel very dry.I tried this method for two years and it has worked great!
Last year, I planted Tulip ‘Brownie’ (double), ‘Pink Princess’ (variegated foliage), Apricot Impression’ and ‘Akebono’ (yellow). In the spring I’ll add violas or pansies on top of the soil.
I hope I don’t get tempted by any more discounted bulbs later this month!
I hope I don’t get tempted by any more discounted bulbs later this month!
|
|
|
|
September 2023
18 Deer Resistant Shrubs to Plant this Fall!
Living in the suburbs no longer guarantees that you won’t have herds of deer foraging on your prize landscape plants. So, this fall purchase deer-resistant shrubs!
Only a deer fence can completely eliminate the problem (which isn’t always practical and can be expensive), another way to minimize damage is to plant varieties that deer find distasteful due to their smell, texture or taste. Here are some deer-resistant shrubs to experiment with in your landscape. They all come in varieties with different sizes, shapes and foliage and flower colors.
1. Buxus sempervirens (Dwarf Variegated English Boxwood) - Evergreen, year-round color, amenable to shearing, good specimen or edging plant into formal hedging and topiaries. (Zones 5-9, full sun to full shade)
2. Caryopteris ‘First Choice’ (Bluebeard) - deciduous shrub, blue flowers that bloom from late summer to early fall (Zones 5-9, full sun)
3. Buddleia davidii 'Pink Delight'(Butterfly Bush) - Flowers bloom over an exceptionally long time, attractive to butterflies, bees and other insect pollinators (Zones 5-9, full sun)
4. Spirea 'Magic Carpet' (Spirea)- Easy-care deciduous shrub, rose-purple flowers that occur from spring into summer, use as a specimen, container plant or massed in the landscape (Zones 4-8, full sun to part sun)
5. Viburnum nudum (Viburnum) - Many varieties have attractive berries and glossy leaves, fragrant spring blooms, use as a hedge or as a specimen plant for late fall color (Zones 5-9, full sun to part sun)
6. Deutzia gracilis 'Minicream' (Deutzia) - Low-maintenance deciduous shrub, fragrant bell-shaped flowers in spring, (Zones 5-8, full sun to part sun)
7. (Forsythia)-One of the earliest shrubs to flower in spring, yellow bell-shaped blooms, tough deciduous use as hedging, in foundation plantings or mixed borders zones 5-8, full sun to part sun)
8. Chamaecyparis pisifera 'Filifera Aurea' (False Cypress) - Evergreen shrub, attractive cedar-like foliage and year-round interest (Zones 4-8, full sun to part sun)
9. Juniperus squamata 'Blue Star' (Juniper) - Evergreen conifer with year-round appeal, blue-green berries (Zones 4-8, full sun)
10. Osmanthus 'Goshiki' (False Holly) - Evergreen holly-like leaves, fragrant flowers in autumn (Zones 6-7, sun- part shade)
11. Prunus laurocerasus 'Andri' (Cherry Laurel) - Shiny, evergreen leaves, flowers flowed by berries early summer (Zones 6-9, sun - part shade)
12. Hibiscus syriacus 'Lucy' (Rose of Sharon)- tropical-looking flowers in late summer, deciduous shrub (Zones 5-9, full sun)
13. Callicarpa dichotoma (Purple Beautyberry) - Deciduous shrub, eye-catching purple berries from late summer through fall Zones 5-8, sun to partial shade)
14. Syringa (Lilac) - Clusters of sweet fragrant blooms in spring, deciduous bush (Zones 3-7, full sun)
15. Weigela florida (Weigela) - clusters of tubular flowers in spring, deciduous foliage, foundation plantings or in the landscape (Zones 4-8, full sun)
16. Skimmia japonicum (Skimmia) - dense, mounding evergreen, fragrant flowers and foliage, attractive berries (Zones 6-8, part shade- shade)
17. Lagerstroemia indica ‘Tonto’ (Crapemyrtle) - large blossoms, color from summer through fall (Zones 6-10, full sun)
18. Abelia x 'Rose Creek’ (Abelia) - fragrant white and pink blossoms in spring and lush, glossy foliage (Zones 4-8, part sun to sun)
August 2023
General:
- Shop for bulbs to be planted in the fall.
- Check the clearance racks for late summer bargains.
- Pick vegetables and fruits regularly so the plants keep producing.
- Harvest potatoes and onions.
- Thin out your strawberry plants. Transplant extras into a new bed.
- Plant lettuce, spinach and beets for a fall crop.
- Harvest herbs for immediate use and/or drying or freezing. Basil produces better if cut back regularly.
- Prune back berry bushes that have finished producing.
- At the end of the month, start removing new flowers from eggplants, peppers, squash, and large (not cherry) tomatoes. This trimming will encourage the plant to focus its energy on ripening the fruit that has already started developing.
- Start pansies from seed indoors to plant outdoors in the fall for early spring bloom.
- Continue to deadhead summer flowers that have finished blooming.
- Divide daylilies, iris, hosta and other perennials.
- Stop feeding roses, trees, shrubs, and perennial flowers mid-month. Feeding plants in the late summer and fall encourages new growth that probably won’t survive the winter.
- Feed your pond plants with aquatic plant food tablets.
- Allow some annuals to go to seed and harvest the seed for next year.
Maintenance:
- Beat the heat by gardening in the morning and evening hours. Watch the sun and move with the shade.
- If there hasn’t been enough rain, supplement by watering your plants deeply once per week.
- Be on high alert for insect pests. These include thrips, aphids, tomato hornworms, spider mites, red lily beetle, scale, snails, and slugs.
- Remove and dispose (in the trash) diseased foliage on plants.
- Avoid pruning shrubs after mid-August.
- Make a list of plants that need thinning or transplanting to other locations in the fall.
- Repot houseplants before bringing them indoors in late summer.
- Keep weeding the garden and refresh the organic matter and mulch in landscape beds.
July 2023
The Elusive Pruners
What's your preference- anvil or by-pass pruners? As for me, I like the by-pass pruner, but it's not necessarily the brand I care about. I own Felco's, Fiskers, Snap Cut, store brands, no-names, and free giveaways. It's nice if they're sharp, but it's better if I can find them!
A lot of them end up in the kitchen, being deposited there when making cuttings for arrangements or thrown on the counter and forgotten when I come inside for a water break. Inside the house, there's a basket by every doorway leading to the great outdoors containing gardening paraphernalia. A collection of gardening tools always ends up under the overhang of the front entrance. Of course, some of my pruners have ended up in the garden just waiting for me to find them! Lastly, I must not forget the hand pruner that's supposed to stay in the car! You never know when you'll need your pruners!
I guess I should be thankful that my husband has turned the garage into a woodworking shop that's off limits to anything related to gardening or I'd be forever searching in there. Of course, there's the shed, but I really don't know what's buried there! It was supposed to be dedicated to my gardening stuff, but somehow my husband's odds and ends like power washers, discarded wire shelving, antifreeze and fence poll diggers have been finding their way into my shed! Not to mention any extra tools that he doesn't need, but doesn't want to get rid of. Honestly, he has a whole four car garage for his junk!
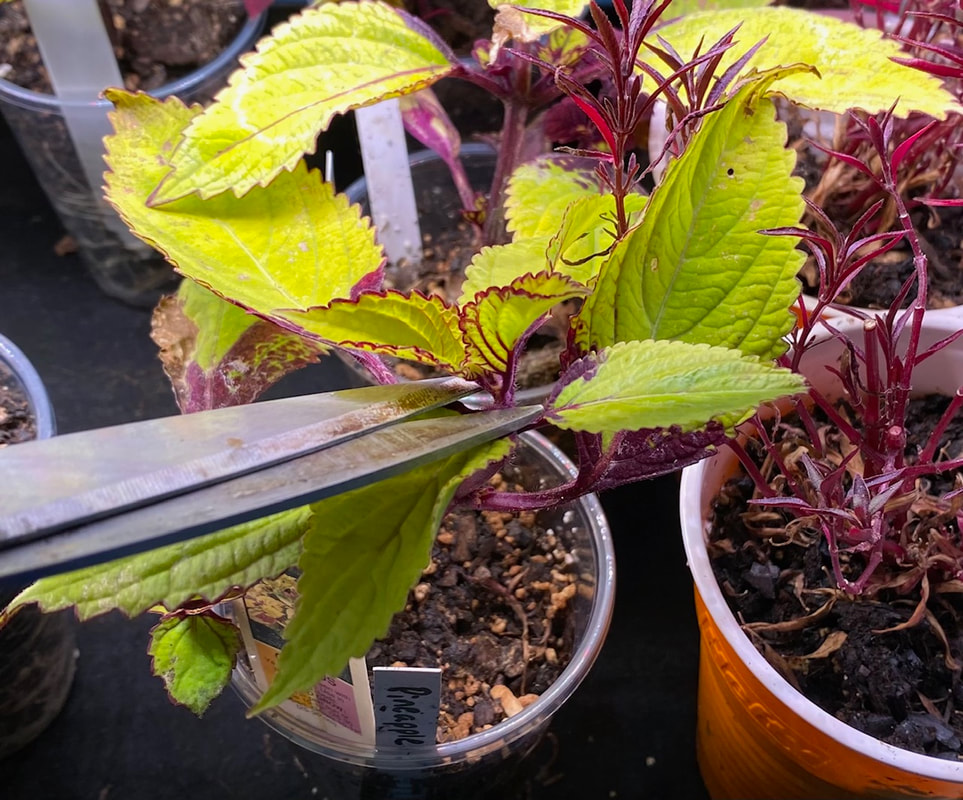
Thankfully, I've discovered one good tip- a kitchen scissors will do in a pinch if you can't get your hands on the elusive pruners! Now where is that scissors!
Disclosure: I have a tool bucket that I carry around in the garden. In it there is usually a pruners- not!
What's your preference- anvil or by-pass pruners? As for me, I like the by-pass pruner, but it's not necessarily the brand I care about. I own Felco's, Fiskers, Snap Cut, store brands, no-names, and free giveaways. It's nice if they're sharp, but it's better if I can find them!
A lot of them end up in the kitchen, being deposited there when making cuttings for arrangements or thrown on the counter and forgotten when I come inside for a water break. Inside the house, there's a basket by every doorway leading to the great outdoors containing gardening paraphernalia. A collection of gardening tools always ends up under the overhang of the front entrance. Of course, some of my pruners have ended up in the garden just waiting for me to find them! Lastly, I must not forget the hand pruner that's supposed to stay in the car! You never know when you'll need your pruners!
I guess I should be thankful that my husband has turned the garage into a woodworking shop that's off limits to anything related to gardening or I'd be forever searching in there. Of course, there's the shed, but I really don't know what's buried there! It was supposed to be dedicated to my gardening stuff, but somehow my husband's odds and ends like power washers, discarded wire shelving, antifreeze and fence poll diggers have been finding their way into my shed! Not to mention any extra tools that he doesn't need, but doesn't want to get rid of. Honestly, he has a whole four car garage for his junk!
Thankfully, I've discovered one good tip- a kitchen scissors will do in a pinch if you can't get your hands on the elusive pruners! Now where is that scissors!
Disclosure: I have a tool bucket that I carry around in the garden. In it there is usually a pruners- not!
June 2023
What’s the Chelsea Chop?
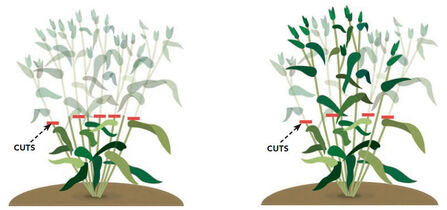
The Chelsea chop is a pruning technique that is done in mid-May (around the time of the RHS Chelsea Flower Show). This method is used to control the size, shape and flowering time of select summer-flowering perennials.
When doing the Chelsea chop, you simply cut back the entire plant by a third to a half or alternately, prune out only part of the clump. Cutting back the plant will encourage bushier and stronger growth to grow, but it will delay bloom time by about six weeks. This technique will help tame “leggy” plants like Sedum ‘Autumn Joy’ or by cutting only some stems back, extend the bloom time of fall blooming asters.
You can’t use this method on all summer-blooming plants, but some flowers that respond well to being “chopped” are phlox, yarrow, goldenrod, campanulas, asters, rudbeckias, upright sedums, heleniums, catmint, and perennial sunflowers (helianthus).
https://www.finegardening.com/article/whats-deal-chelsea-chop
May 2023
Maintenance:
- Weed! Weed! Weed! See my spring weed chart: spring weed identification Chris Petersen.pdf
- Finish preparing your planting beds by adding organic material and soil amendments.
- Divide large perennials to make room for new plants.
- It’s time to thin out your fruit trees.
- Set supports for floppy plants, like delphinium, lilium, dahlias and peonies.
- Set up sprinklers and start a regular watering program. Your lawn and plants need at least an inch of water a week.
- Mulch landscape beds, adding a two to three-inch layer of bark mulch, nuggets or wood chips to help reduce weeds and conserve moisture.
- Deadhead bulb plants as the flowers fade, but allow foliage to die back naturally in order to feed the bulbs for next year’s display.
- Continue to apply deer and rabbit repellents.
- Aerate and fertilize your lawn around Memorial Day.
- Edge beds to keep things looking neat and tidy.
- Trim lilac bushes and other spring flowering shrubs after they bloom.
- Pinch back chrysanthemums for bushier plants.
- Fertilize summer blooming flowers, roses and fruit trees.
- Plant some container gardens.
http://www.ladybug.uconn.edu/FactSheets/gardening-tips-may.php
Planting:
- When the soil temperature reaches 60° F, it’s time to plant tomatoes, sweet potatoes, melons, peppers, cucumbers and eggplants.
- Plant seed potatoes.
- Plant summer annuals after the last frost date, a good rule of thumb is after Mother’s Day.
- Plant summer bulbs such as Gladiolus, Cannas, Colocasia, Alocasia and Dahlias.
- Plant deciduous and evergreen trees and shrubs, as well as perennials.
- Once the threat of frost is gone, and nighttime temperatures stay in the 50s or higher, you can start transitioning your plants outdoors for the summer.
- Place them in a shaded area for a few days and then gradually increase the amount of time they spend in the sun every few days.
- Keep in mind most plants cannot tolerate direct sunlight. Even those who like bright light indoors.
- For most plants morning sun and afternoon shade will keep them thriving outdoors.
- Make sure any shade plants are protected from direct sun at all times.
https://www.englishgardens.com/may-gardening-tips/
April 2023
Maintenance:
- Rake debris carefully off beds that hold the earliest bloomers.
- Cut back evergreen or otherwise persistent perennial foliage on hellebores, euphorbia, epimediums, lilyturf and carex.
- Cut down ornamental grasses as close to the base as possible.
- Trim shrubs such as privet hedges.
- Summer flowering shrubs such as spireas and hydrangeas aborescens may be cut back to the ground as they bloom on new wood and will quickly grow back and bloom in mid-summer.
- Divide grasses and perennials if necessary. Discard old woody growth on grasses.
- Seed bare spots in your lawn. Dead grass must be raked out first to make sure the seed is in direct contact with bare soil.
- Remove fallen leaves from water gardens. Get the filters and pumps running once sub-freezing nights cease.
- Order bulk mulch from a local source for delivery. Your arborist may bring you a free truckload of woodchips.
- Minimize soil disturbance by not tilling or pulling weeds too vigorously (which would bring weed seeds to the surface or allow others to sow in).
- Dig out perennial and biennial weeds, such as garlic mustard, when possible before they get a foothold.
- Add an inch of compost as a topdressing, no need to till.
- Fertilize spring bulbs with an appropriate all-natural organic fertilizer as they break dormancy.
- Use cardboard or newspaper to smother areas for new garden beds, or slow down weeds in existing beds.
- Prune Type 2 and 3 clematis. For more information:https://awaytogarden.com/fear-not-how-to-prune-clematis-with-dan-long/
- Pansies, violas, poppy anemones (Anemone coronaria), nemesia and ranunculus are cold hardy and can be planted in outdoor containers. Make sure that you harden them off before planting.
- April showers and cooler temperatures make it a good time to plant trees, shrubs and evergreens.
- Cool season vegetables such as leaf lettuce, Swiss chard, beets, arugula, peas, carrots spinach, radishes and onion sets may be planted outdoors as soon as the soil is dry enough to work.
- Snapdragons, bachelor buttons and sweetpea seed can be planted outside in April as well.
- Plant perennial herbs such as thyme, lavender, oregano, chives, mint, and sage in the garden.
- Clean out bird houses.
Indoors:
- Start your tuberous begonias, canna and dahlia tubers in trays of moistened vermiculite or individual pots of fast-draining potting soil. Grow in a bright, warm spot.
- Start seeds of annuals such as zinnias and sweet peas, herbs including basil and parsley, and vegetables especially tomatoes and peppers in the beginning of the month.
- At the end of the month, start hardening off any plants that will be going outdoors after the threat of frost.
March 2023
What to Plant Indoors:
- Start seeds approximately six to eight weeks before they’re ready to be transplanted outdoors.
- Start seeds for tomatoes, peppers, and eggplants indoors and under grow lights.
- Sow onion seeds providing good light for the seedlings as they emerge. Onions grown from seed will produce the best bulbs and store better than ones started from onion sets. You can trim them as needed.
- Start annual flowers such as ageratum, impatiens, marigolds and petunias.
- It’s time to transplant seed grown cole crops. Put your cabbage, broccoli, and other crops in a cold-frame to give them time to prosper.
- Plant dahlia, canna, tuberous begonia and caladium bulbs in pots or flats using a soil mix containing slow-release fertilizer. Grow them in good light indoors until they are ready to go outside in May.
- Give indoor plants a new lease on life by transplanting them into a larger pot with fresh soil.
- Prune houseplants that might have grown leggy over the winter.
- Purchase a shamrock (oxalis) plant to provide a living, green, St. Patrick’s Day decoration.
Garden Maintenance:
- Force some branches from forsythia, barberries, quince, flowering plums or other spring blooming plants in containers of warm water.
- Turn the compost pile to get the compost “cooking” again.
- Send a sample of your soil into your local county extension service office for testing.
- Apply compost or an organic soil amendment to the soil.
- Prune and fertilize rose bushes before buds break.
- Rake leaves and mulch away from garden beds to allow the foliage of spring-flowering bulbs and perennials to poke through.
- Rejuvenate older flowering shrubs that have grown too tall and are not blooming well by cutting the whole plant down to within 3”-4” of the ground.
- Cut back liriope, carex, and tall grasses before new growth begins.
- Deadhead daffodils when the blooms fade, but allow the foliage to die back naturally.
- Don’t walk across your garden when the soil is wet as this practice may lead to compaction, which can cause poor drainage.
- Check your irrigation system.
- Fertilize cool-season lawns (Tall Fescue).
- Apply pre-emergence herbicides to lawns by the time dogwoods bloom.
- When mowing, don’t remove more than 1/3 of the height at any one mowing; leave clippings on the lawn unless they would smother the grass.
- Practice slug control.
- Clean out birdbaths and feeders.
- Collect rainwater. Install barrels under downspouts to tide your garden over during dry spells.
Planting Outdoors:
- Plant cold hardy summer bulbs such as lilium at the end of the month.
- Plant peas (late March).
- Plant rose bushes, shrubs, trees and perennials as soon as you can work the soil.
- Divide and replant daylilies, hostas, peonies, Shasta daisies, asters, boltonia, phlox, rudbeckia and chrysanthemums when new growth is 1-2 inches high.
- Plant hardy annuals such as pansies, anenomies and ranunculus.
- Wait until the soil dries some and warms up before planting summer bulbs such as dahlias in the ground.
February 2023
Maintenance
- Give conifers a haircut before new growth appears. Yews, chamaecyparis, and arborvitae will respond well to a winter pruning. Shear conifer hedges.
- Cut back evergreen perennials such as liriope (lilyturf), epimediums, and ferns.
- Both smooth and panicle hydrangeas should be pruned in winter to take off any dead wood and spent blossoms. All other hydrangea types should be pruned in summer after blooming.
- Cut back your ornamental grasses to 6” above the ground.
- In late winter, do general and renewal pruning of trees, vines and shrubs; prune summer-flowering plants that set buds on new wood (butterfly bush, crape myrtles, etc.). Cut out deadwood, damaged wood and shoots growing in the wrong direction.
- Keep pulling those winter weeds like hairy bittercress, purple deadnettle, chickweed and dandelions. Winter weed identifier from the Missouri Botanical Garden: https://tinyurl.com/5ycwkrhz.
- Late-season (Group C) and midseason-flowering (Group B) clematis should be pruned.
- Remove all dead hosta, brunnera and other mushy ground cover foliage. Dead leaves harbor slug eggs that will hatch and ruin next year’s foliage.
- Don’t let bunnies and deer mow your plantings down. Erect cages of chicken wire or wire cloches around choice plants.
- Apply dormant oil spray were necessary to susceptible shrubs and fruit trees.
Planning
- Create a garden plan. Decide what you want to grow – and where!
- Try something new. Venture beyond your old standbys and plan on planting something you’ve never grown before.
- Inventory your seeds to avoid duplicate purchases.
- Shop for summer-blooming bulbs while the selection is good.
- Start perennial (rudbeckia, echinacea, etc.) and cool season annual (snapdragon, stock, etc.) seeds indoors or using the winter sowing technique. See the articles on seed sowing techniques on our webpage under “Articles and Inspiration” (scroll down): https://asharokengardenclub.weebly.com/news--articles.html.
- Bring in some branches for forcing in water such as forsythia, pussywillow, cherry or quince.
January 2023
|

|
If you have prepared your garden as per Chris Petersen’s suggestions in our December 2022 newsletter, you have a jumpstart on 2023, but let’s get our gardens in order early for a smooth gardening season!
Get Organized
January is the month you begin to go through all your seeds. This will let you know what seeds you have already, and which seeds you need for the next season. Once you know what you’re missing, get a jump start on placing your order. You don’t want to have to deal with substitutions, for seeds you wanted that have sold out.
Begin planning your next garden. Draw it up on paper. Know what you want to plant and where it should be planted. This will make starting your garden a ton easier.
Put the Warm Days to Use
It’s inevitable at some point in January you’ll have a few warm days. Put these days to good use.
During the winter, chickweed and wild onions like to sprout in some of your garden beds. Use the warm days to pull these items out of your garden beds.
Start Seeds
Do you enjoy the fresh look of flowers in the spring? If you don’t want to spend a fortune buying flowers to add color to your home in the spring, you must get started now. You can start pansies from seed indoors. This will give them time to sprout and gain strength before being transplanted outdoors.
Towards the end of January, there are some seeds you should get busy starting indoors. If you enjoy broccoli, onion and cabbage, they can be started inside. However, you can also grow some lettuce indoors too. This will be a welcomed task considering it’s difficult to have many fresh greens over the winter months.
Direct Sow Certain Veggies
Will seedlings survive winter? If sown in the ground, cold hardy seeds should survive this weekend’s freeze without damage. Though air temperatures are predicted to drop into the teens, soil temperatures will remain much warmer thanks to the ground’s ability to store heat. Though it’s cold outside, there are some vegetables which are hearty enough to be able to withstand the temperatures.
Be sure to plant them in a cold frame or under row covers for added protection.
Some edible options for winter sowing include the classic cool-season crops – like broccoli, onions, cauliflower and cabbage. Leafy greens – like lettuce, kale and bok choy – are also hardy annual options. Herbs like sage, oregano, dill, and mint are good winter sowing candidates too.
Prep Strawberries and Asparagus
Do you have established strawberry and asparagus beds in your yard or garden? It’s time to take care of them. Begin by pulling any weeds in the beds. Finish the job by adding fertilizer to the beds and topping them with a fresh layer of mulch.
Take Care of Your Bushes
If you get snow, give your bushes a bit of a reprieve, try knocking the snow off of them.
Resource: morningchores.com, hoeandrake.com