|
Native Plants
By Caren Alessio This is a very broad subject. I want to start a conversation about them because they are beneficial to have in our gardens. There is a lot to say about them and I hope to give you a snapshot of why they are important. I grew up in Nassau County. I remember my grandfather telling me stories about how Long Island was all open space with many farms here. He lived a long life. He couldn’t stand how much traffic and how built-up Long Island became. Look at Long Island now, we have tons of traffic and suburban sprawl, like he said. We have created a place where it is hard for insects and animals to live. An example, we do not have any predators to help take care of our deer population. What does this have to do with Native Plants? In his book “Bringing Home Nature” Douglas Tallamy states that “We have reduced the enormous land mass that, over millions of years, created the rich biodiversity we can still see today in this country to tiny habitat islands. He studied plants in his own backyard and noticed there were no insects where there were nonnative plants and he noticed a lot more on native plants. The insects were eating the native plants. They did not like the nonnative plants. Insects have ways of detecting the plants they like to eat and they have enzymes that help to digest the food they eat. Mr. Tallamy shows how complex insects are in his book. I will not go into detail here, but it is very interesting. He suggests to people to make their lawns into gardens by using native plants. He states in his book, I quote: “our wildlife will not be able to survive unless food, shelter, and nest sites can be found in suburban habitats. The food for all animals starts with the energy harnessed by plants, the plants we grow in our gardens have the critical role of sustaining, directly or indirectly, all of the animals with which we share our living spaces. And because it is we who decide what plants will grow in our gardens, the responsibility for our nation’s biodiversity lies largely with us.” True, there are beneficial insects and non-beneficial insects in our gardens. For example, I am sure you all see that something eats the leaves of your lilies. The damage is due to the red lily beetle. I always pick them off my lilies or I will take a watering can with soap and water and pour the concoction over my plants. I do not use pesticides in my garden. I leave nature alone for it to take care of itself. Yes, I know insects can destroy your plants but they need to grow and survive. We need them to pollinate our plants or we will not have food to eat and it will be the end of us. As a garden club, I believe we are ambassadors for the environment. We need the insects, bees, butterflies and birds in our gardens. Native plants are beneficial because they provide food and they are a source of shelter for birds and other animals. Insects are a powerhouse food source for birds. To quote A. O. Wilson, he called insects “the little things that run the world.” I am not telling you that you must plant all natives, just a few. Try to attract some more bees and butterflies and birds to your gardens. Here are a few terms and their definitions as to why plant native flowers in our gardens. The National Wildlife Federation explains that “Native plants have formed symbiotic relationships with native wildlife over thousands of years, and therefore offer the most sustainable habitat. A plant is considered native if it has occurred naturally in a particular region, ecosystem, or habitat without human introduction.” “A cultivar is a type of plant that people have bred for desired traits, which are reproduced in each new generation by a method such as grafting, tissue culture, or carefully controlled seed production. Most cultivars arise from purposeful human manipulation, but some originate from wild plants that have distinctive characteristics. Cultivar names are chosen according to rules of the International Code of Nomenclature for Cultivated Plants (ICNCP), and not all cultivated plants qualify as cultivars. Horticulturists generally believe the word cultivar was coined as a term meaning "cultivated variety".” (Source: Wikipedia) The Chicago Botanic Garden defines an invasive plant as “a species, usually nonnative, that is able to establish itself within existing native plant communities and is posing a threat to the integrity of the community.” It also states that “an aggressive plant is one that spreads faster than preferred, or into an area of your garden where it is unwanted. A plant may be aggressive in one area of a garden or neighborhood and well behaved in another.” Plants form the foundation of the habitat for many different species of insects. In turn, these support other animals and thus, our environment in general. When the plants and insects that form the base of our wild food chain are present in higher numbers, and when shelter and habitat are better connected across the landscape, wildlife populations are more resilient to disruptions in nature, for example fires and storms. (Source: Xerces Society) Each of us can create a diverse ecosystem for our property that will help the environment in the long run. Before I end, I became interested in Native Plants from our fellow member, Kathy Fernandez, from the AGC. Kathy often mentioned facts about native plants. For instance, that Common Milkweed and Swamp Milkweed, provide food for the Monarch Butterfly. She piqued my interest in native plants while helping at the garden in Northport across from the Northport Fire Department. She is a strong proponent to saving the monarch butterfly. So, I thought by helping at the garden there, I was helping in some small way the environment and I could learn more about gardening. Then, I started to think of how I could have a Pollinator Garden of my own. . I have created a small one in front of my house. I now have a few nonnatives with mostly native plants. In time I hope to convert my non-native plants to native plants, that is the goal. Might not be all of them, but a few that I must convert. The native plants that I have in my garden are: Monarda didyma 'Balbalmurp' = Bee Balm Liatris microcephala = Dwarf Blazing Star Pycnanthemum tenuifolium = Thread leaf Mountain Mint Asclepias syriaca = Common Milkweed Asclepias incanata = Swamp Milkweed Eupatorium perfoliatum = Boneset Symphyotrichum leave = Smooth Blue Aster Ilex x verticillate = Winterberry Echinacea purpurea Bravado = Coneflower Aquilegia sibirica = Columbine Zizia aurea = Golden Alexanders Tiarella x 'Fingerpaint' = Foam Flow Baptisia austalis = False Indigo U.S. Department of agriculture Natural Resources Conservation Service Did you know that the USDA has a search function on their website where you can search for native plants for any state, down to the County? Well, now you do! Use this link to start your search. (https://plants.sc.egov.usda.gov/home/stateSearch). You could even download the results. For Suffolk County, NY, there are 3,511 results!

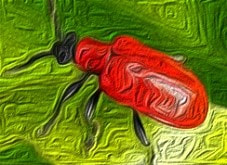
The scarlet lily beetle, red lily beetle, or lily leaf beetle (Lilioceris lilii), is a beetle, native to Eurasia, that feeds on the above ground parts of lilium including the leaves, stem, buds, and flowers. Species lilies, Asiatic, Oriental, martagon and other types of lilies are all susceptible. Fritillaria are also at risk from this beetle. These beetles were first discovered in eastern Canada about 50 years ago, and have gradually gained a foothold in most of New England, New York, Washington, Oregon and central and western Canada. The adult lily beetle is about ¼–⅜ inch in length, with relatively long legs and antennae. Its forewings are bright scarlet and shiny. Its underside, legs, eyes, antennae and head are all black. It has large eyes, a slim thorax, and a wide abdomen. The beetle overwinters in the soil and emerges early in spring to feed and mate. The female lays up to 450 eggs each season in groups of approximately 12 on the undersides of the lily leaves. The reddish orange eggs are arranged along the midrib of the leaf and hatch in 2-3 weeks into light brown or orange larvae that are soft and slug-like.The larvae are voracious feeders, devouring the lower leaves first and moving upward on the stem, for up to 24 days. Then, they burrow in the earth to pupate in a cocoon of soil reinforced with saliva. In about 20 days, they emerge as adult beetles and continue to feed until winter. Unfortunately, more than one cycle can occur throughout the year. Partially chewed leaves are often the first sign that the beetles have found your garden! Left unchecked, the beetles will rapidly defoliate the stem. Beetles and their larvae may also chew on the flower buds. A defoliated lily, might not have enough stored energy to bloom or return the next year. All types of lilies may be eaten, but some sources report that some Oriental lilies may be more resistant. 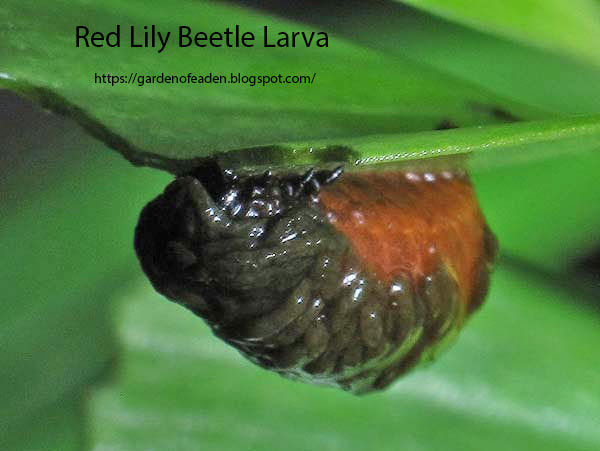
Sometimes, the first evidence of lily leaf beetle infestation is sticky brown frass (feces) containing larvae on leaves. The larvae remain in the frass for protection from the sun and predators. Red lily beetles are fast and tough to catch. An adult that senses danger displays a defense mechanism, by becoming motionless, folding up and falling with its black underside facing up, making it difficult to see on the ground. Many people have chosen to forgo planting lilium altogether, but if you are determined to have lilies, you must be diligent about hand picking and crushing the eggs, larvae and beetles at least every few days. Instead of crushing, you may knock the beetles into a dish of hot soapy water. When removing the frass covered larvae, tight fitting throwaway gloves are recommended. Inspect stems and leaves from all angles as the beetles are good at hiding! Products containing neem oil can kill very young larvae and repel adults without comparable harm to other insects. Spray coverage must be heavy and complete. Neem products should be applied every 5 to 7 days throughout the early summer. Spinosad, an insecticide made from soil bacteria, is also effective if applied weekly, However, spray in the evening when bees are not foraging as this insecticide is toxic to bees and other insects. Also, don’t spray on windy days as the spray may drift onto nearby flowers. A natural alternative alleged to help is sprinkling food grade diatomaceous earth at the base of the plant. When the red lily beetle walks through the powder, it is said to kill them in 24 hours. You must reapply after rain. Also, wear a dust mask while working with Diatomaceous Earth. It can be bought in whole food stores. Recently, parasitic wasps are being released experimentally to keep lily leaf beetle populations in check. “Scientists at the University of Rhode Island have released several species of these predators in RI, MA, NH and ME. Over time, lily leaf beetle populations have declined in most of the test areas and the wasps are gradually spreading into neighboring towns. Hopefully this ecological approach will put a dent in the problem.” (https://blog.longfield-gardens.com/how-to-control-red-lily-leaf-beetles/) Lastly, you could try using your cordless hand vacuum to simply "suck them up" before they have a chance to escape! In my opinion, growing lilies is worth the effort it takes to hunt down the red lily beetle. Lilies are so majestic in the garden and their fragrance can’t be matched! Additional Sources: https://en.wikipedia.org/wiki/Scarlet_lily_beetle 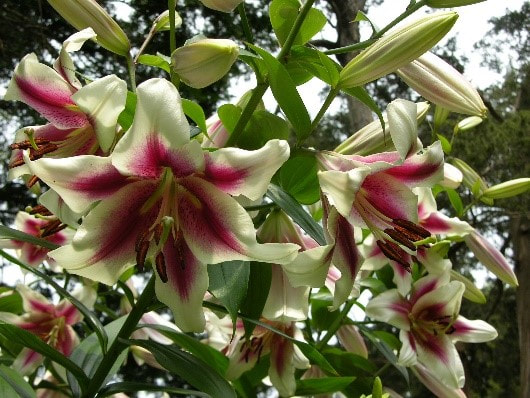
Lilium 'Altari'
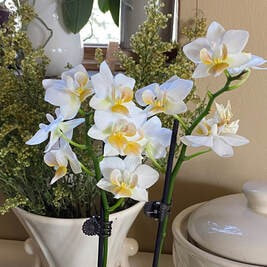
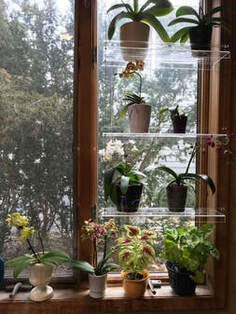
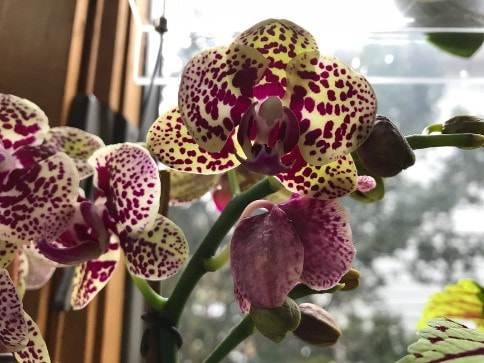
As winter is finally letting go of its grip on the garden, my phalaenopsis orchids are filling the windowsills with their exotic blooms! Your favorite box store or supermarket probably has a selection at reasonable prices. You won’t get a named cultivar, but for the price you can’t beat moth orchids.
|
Part I: WINTER SEED SOWING - OUTDOORS! By Chris Petersen
Although January and February are a bit too early to start most annual seeds, there are things that you can do in winter to make sure that you are off to a running start. January is the perfect time to start winter sowing. Seeds that require cold stratification, hardy perennials and hardy annuals, and many native plants can be started in milk jug seed pots in early to mid-winter. The containers form “mini greenhouses” in which the seeds will naturally germinate in early spring.
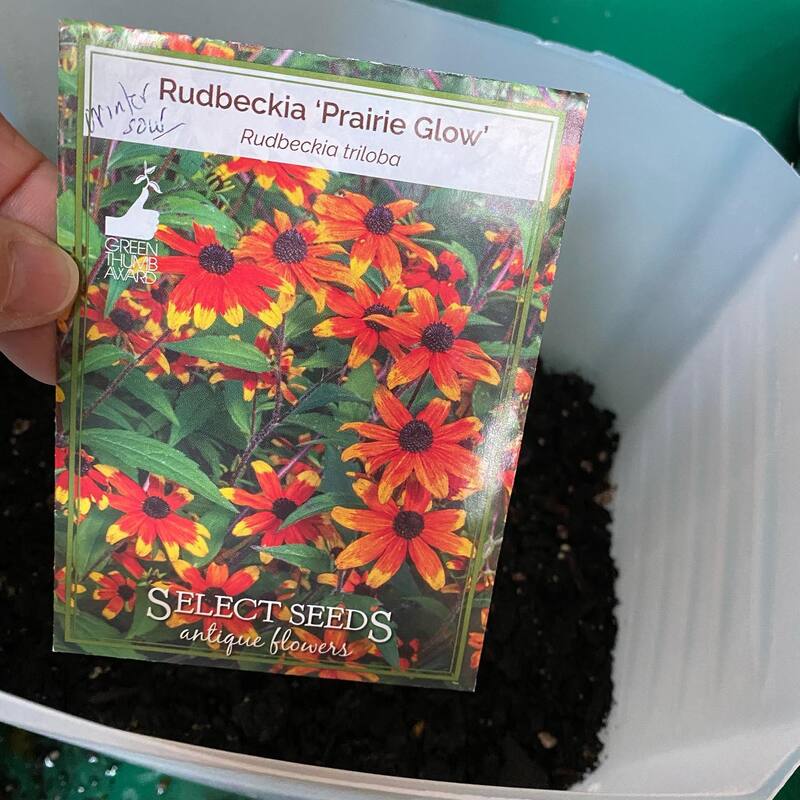
Some common plants that are appropriate for winter sowing are: snapdragons, marigolds, rudbeckias, tithonia, poppies, foxgloves, gaillardia, echinacea, milkweed, herbs and cool season vegetables. Many lists are available online.
Information on seed packets will also help you to figure out which seeds should be planted when. “Direct sow after all danger of frost has passed” becomes code for planting in late winter/early spring, and “start indoors 3-4 weeks before average last frost” means sow in milk jugs in mid to later winter, while “sow 4-6 weeks before average last frost” indicates planting time in early to mid-winter. (https://www.gardeningknowhow.com/garden-how-to/propagation/seeds/milk-jug-winter-sowing.htm)
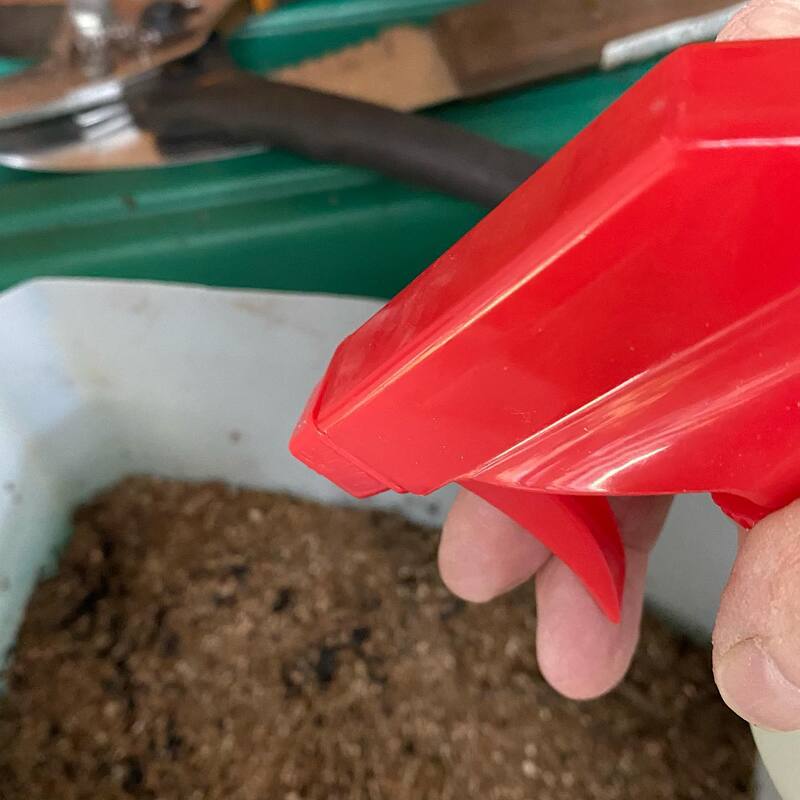
To begin, you will need plastic water, juice or milk jugs, potting soil (not seed starting mix), vermiculite (optional), labels, a paint marker for labelling (permanent markers will fade), a spray bottle, duct tape and of course, seeds.
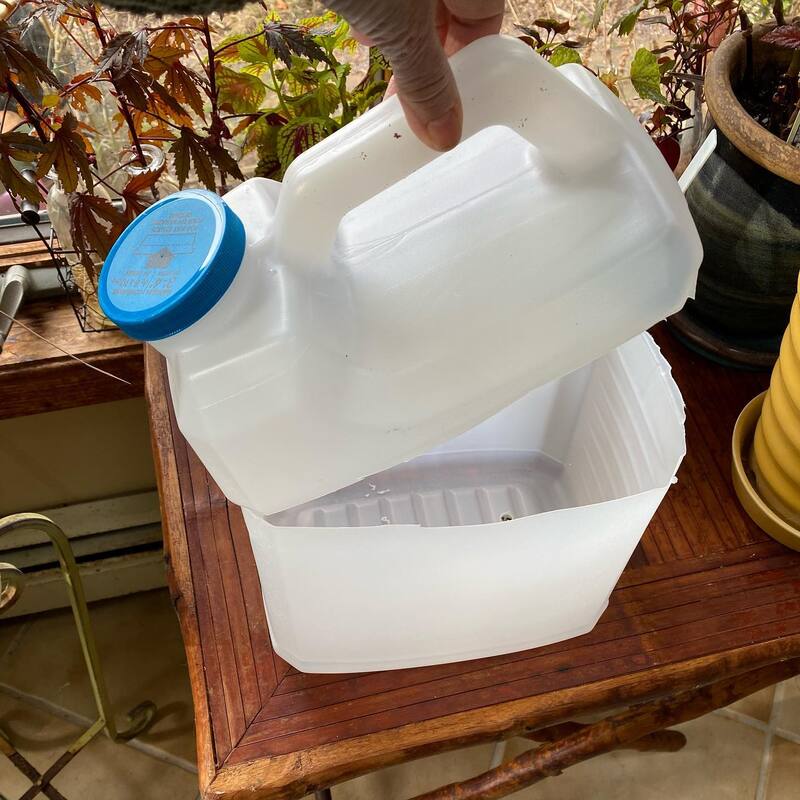
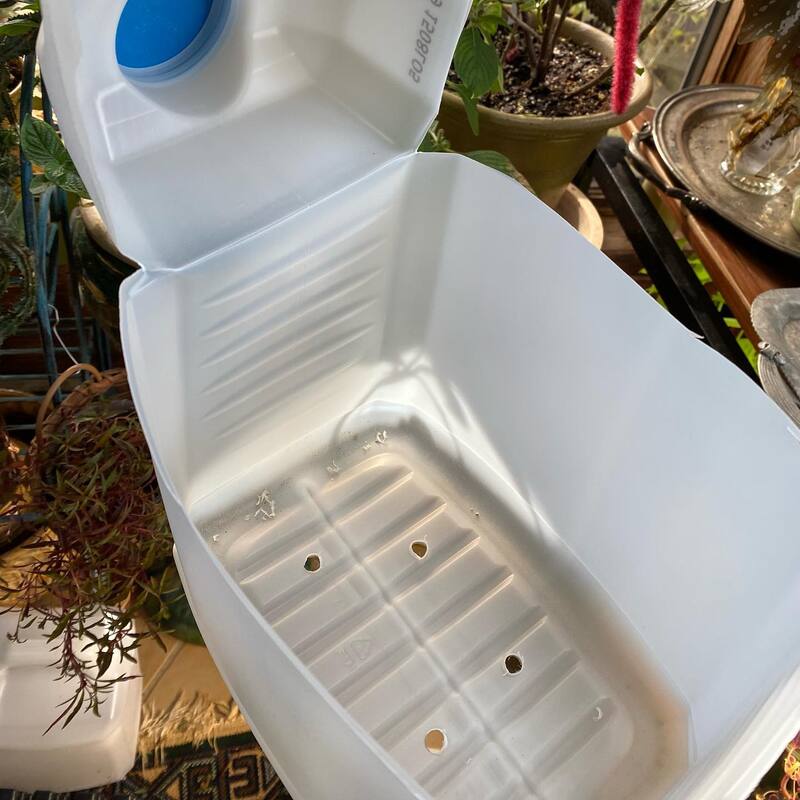
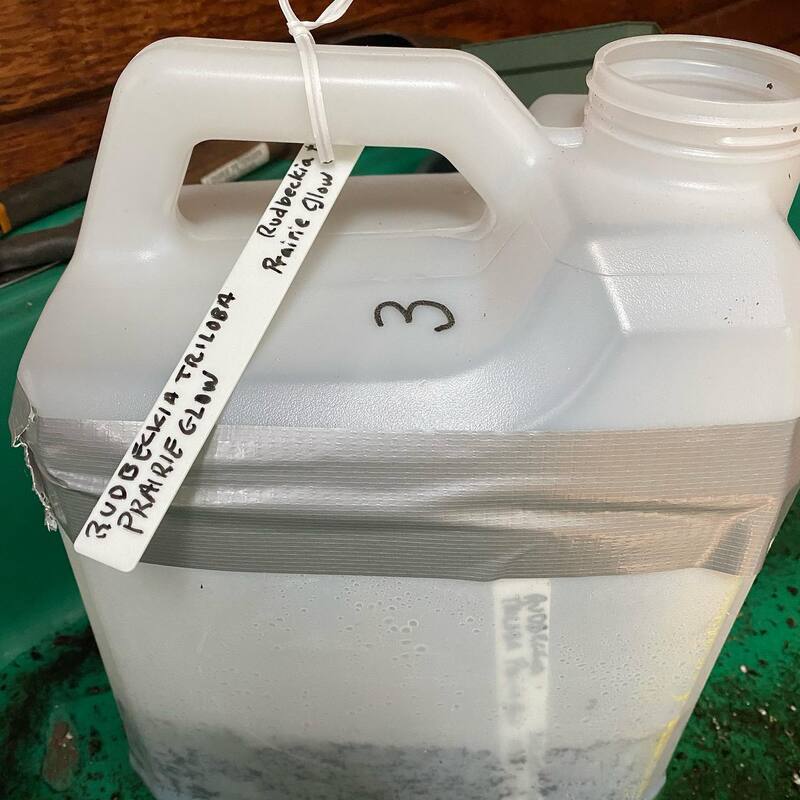
Cut six drainage holes in the bottom of a gallon jug and then cut almost all the way around the jug about 4” from the bottom, leaving the handle intact as a hinge.
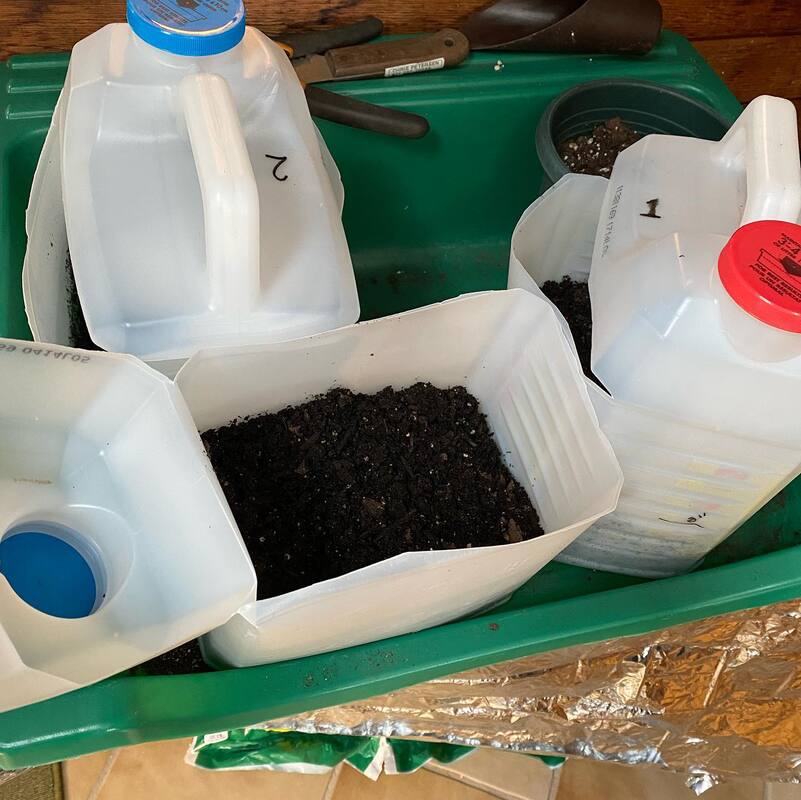
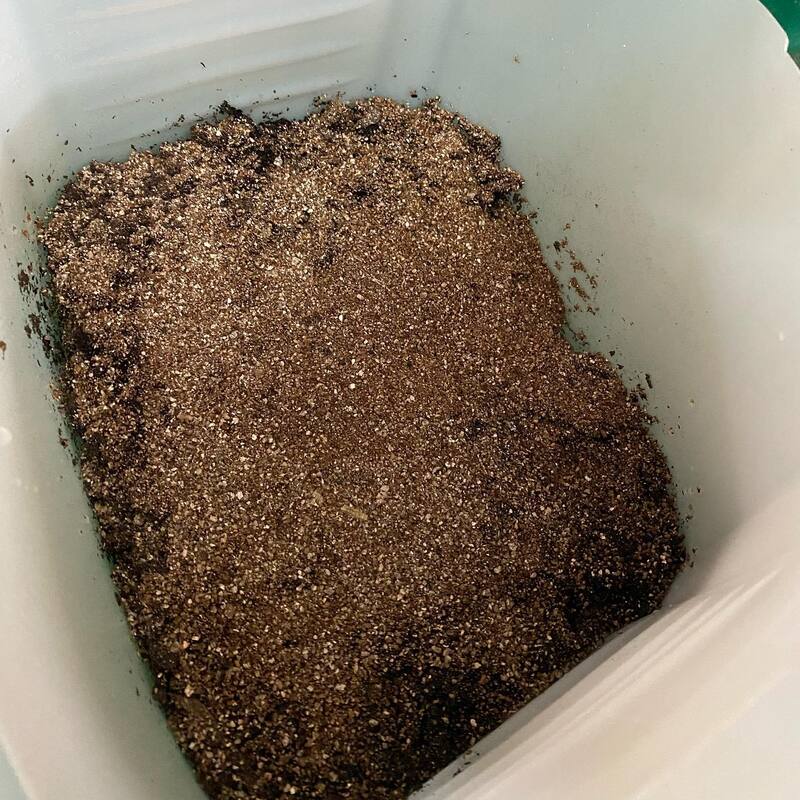
Fill the bottom of the jug with 3 ½” of slightly damp planting medium. Plant the seeds according depth on the seed pack. You can usually plant 6 -12 seeds or more in a gallon jug. Sprinkle the seeds with a light coating of vermiculite or potting mix and tamp down gingerly. Spray to moisten the seeds well. Put a plastic label, with the name written in pencil or with a paint marker, in the jug. Close the top of the jug and seal it with duct tape. Write the plant name with the garden marker on the duct tape or attach another type of label to the handle of the jug. Leave the lid off to allow rainwater to enter.
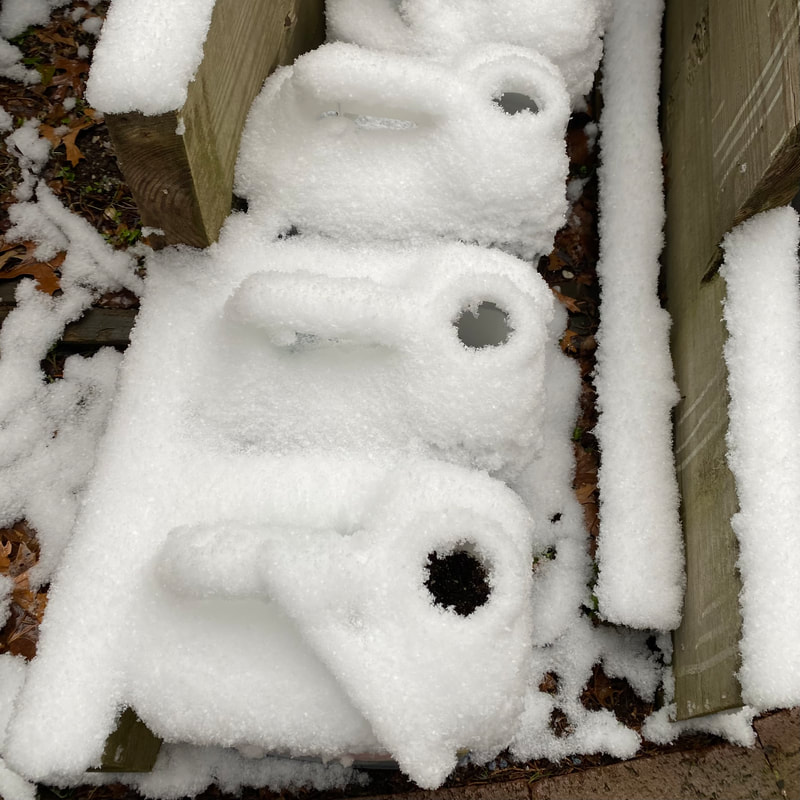
Place the containers in an area of sun outdoors. Water the seedlings lightly if they dry out. When temperatures hit 50-60F, remove the tops of the jugs so the seedlings don’t bake. Cover again in the evening. When the seedlings have produced at least two sets of true leaves, you may transplant them into individual containers to allow the roots to grow and or transplant them directly into the garden.
Although January and February are a bit too early to start most annual seeds, there are things that you can do in winter to make sure that you are off to a running start. January is the perfect time to start winter sowing. Seeds that require cold stratification, hardy perennials and hardy annuals, and many native plants can be started in milk jug seed pots in early to mid-winter. The containers form “mini greenhouses” in which the seeds will naturally germinate in early spring.
Some common plants that are appropriate for winter sowing are: snapdragons, marigolds, rudbeckias, tithonia, poppies, foxgloves, gaillardia, echinacea, milkweed, herbs and cool season vegetables. Many lists are available online.
Information on seed packets will also help you to figure out which seeds should be planted when. “Direct sow after all danger of frost has passed” becomes code for planting in late winter/early spring, and “start indoors 3-4 weeks before average last frost” means sow in milk jugs in mid to later winter, while “sow 4-6 weeks before average last frost” indicates planting time in early to mid-winter. (https://www.gardeningknowhow.com/garden-how-to/propagation/seeds/milk-jug-winter-sowing.htm)
To begin, you will need plastic water, juice or milk jugs, potting soil (not seed starting mix), vermiculite (optional), labels, a paint marker for labelling (permanent markers will fade), a spray bottle, duct tape and of course, seeds.
Cut six drainage holes in the bottom of a gallon jug and then cut almost all the way around the jug about 4” from the bottom, leaving the handle intact as a hinge.
Fill the bottom of the jug with 3 ½” of slightly damp planting medium. Plant the seeds according depth on the seed pack. You can usually plant 6 -12 seeds or more in a gallon jug. Sprinkle the seeds with a light coating of vermiculite or potting mix and tamp down gingerly. Spray to moisten the seeds well. Put a plastic label, with the name written in pencil or with a paint marker, in the jug. Close the top of the jug and seal it with duct tape. Write the plant name with the garden marker on the duct tape or attach another type of label to the handle of the jug. Leave the lid off to allow rainwater to enter.
Place the containers in an area of sun outdoors. Water the seedlings lightly if they dry out. When temperatures hit 50-60F, remove the tops of the jugs so the seedlings don’t bake. Cover again in the evening. When the seedlings have produced at least two sets of true leaves, you may transplant them into individual containers to allow the roots to grow and or transplant them directly into the garden.
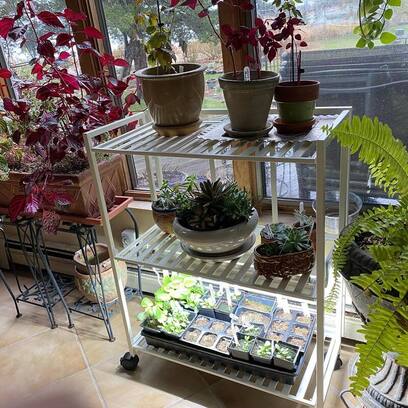
Part II: Indoor Seed Sowing by Chris Petersen
I have to admit that I was not very successful with seed starting at first, but I knew lots of people have had good results, so I was determined to learn! My dad always grew the greatest tomato, cucumber and marigold seedlings on a table set in front of a south facing window. He used old yogurt cups, bottoms of milk cartons, and other recycled containers nestled in reused aluminum foil pans! It wasn’t fancy, but certainly functional! The directions below are a bit more costly, but can be reused for years!
The most important thing I learned about seed starting is timing! The seed packet will indicate how many weeks before your last frost date a seed should be planted indoors. I made a calendar with the dates of indoor seed planting for each cultivar by counting back by weeks. If you start your seeds too early, they will get leggy and outgrow their space. The next most important consideration is light. I bought a few LED light strips and retro-fitted them into shelving that I already had. I used $5 timers to control the amount of light for me. Finally, I read everything that I could about the plants that I wanted to grow.
Then, I followed the directions below. I had so much success last year that I was beaming with pride! You can do it too!
Supplies:
- Seed-starting mix- not potting soil
- Seed-starting kit or
- 24 - 50 cell plug flats or 3 ½” pots
- Leakproof tray (10” x 20”)
- Clear acrylic dome lid or plastic wrap
- White plastic tags
- Paint marker or pencil
- Fine vermiculite
- Heat mat (optional)
- Shop light or LED grow light (optional)
- Shelving
- Fan
- Spray bottle or mister
- Obviously, seeds
Moisten the seed-starting mix with boiling water until it is thoroughly damp but not dripping wet. Let cool. Fill seed cells to the top with soil, tapping them firmly against the table to settle the mix and remove air pockets. Make labels for the varieties of seed to be sown including the date planted. Make a shallow hole in each cell using your finger or a pencil and /or follow the directions for seed planting depth on the seed packet. Drop 1 or 2 seeds into each hole. Cover newly sown seeds with a light dusting of fine vermiculite or seed-starting mix. Be careful to not bury the seeds too deeply. Mist lightly. Cover the tray with the clear dome lid. Set the tray on a 70° F heat mat or in a warm corner of the house. Check the soil for moistness after 2 to 3 days and bottom water, if necessary, by filling the leakproof tray with ½” of water. Let the tray soak up the water from below. Remove excess water. If you are mixing different types of plants on the same tray, try to pick seeds with the same germination times. You may cut your cell plug flats into smaller sizes to reflect the number of seeds of each cultivar that you want to plant.
Check the tray daily. Once 50-75% of the seeds have sprouted, remove the dome lid and move the tray into a spot with bright natural light or under artificial lights. The distance from the lights will depend on the type of lighting used. Seedlings need 14 to 16 hours of light per day. Check seedlings daily and water when needed. Moving air will create stronger seedlings, so place a fan nearby. Seedlings may need to be repotted into larger containers if they grow too big. When two true leaves are present, you may water with 1/4 strength fertilizer.
As the weather warms up (after all danger of frost has passed), begin transitioning the plants outside. It’s important to harden off young plants before planting them in the garden to prevent shocking them due to light and temperature changes. Set the tray in a sheltered, shaded spot outside, increasing the amount of time outdoors each day, starting with 2 to 3 hours. Then, increase the time and light slowly over the course of a week or so, at which point seedlings can remain outside.
Useful reference: https://workshop.floretflowers.com/
|
Good Sources for Seeds
Annie’s Annuals & Perennials www.anniesannuals.com Specializes in rare and unusual plants Baker Creek Heirloom Seeds www.rareseeds.com/ Lots of heirloom and exotic vegetable seeds you won’t find at the garden center Burpee www.Burpee.com Floret www.floretflowers.com Unique, uncommon and heirloom flowers for cutting. Website has good information. Johnny’s Selected Seeds www.johnnyseeds.com Sells seeds for fruits, vegetables, flowers and herbs, offers certified organic seed options John Scheepers Kitchen Garden Seeds www.kitchengardenseeds.com Family owned and operated, sells seeds for fruits, vegetables, flowers and herbs Park Seed www.parkseed.com Prairie Moon Nursery www.prairiemoon.com Plants, seed mixes and information for all types of native plantings and restoration Renee’s Garden www.reneesgarden.com Gourmet vegetables, herbs and cut flowers, especially large sweet pea flower collection Seed Savers Exchange www.seedsavers.org Heirloom and old-fashioned seeds; committed to preserving biodiversity Select Seeds www.selectseeds.com Heirloom, uncommon, award winning and pollinator-friendly seeds Territorial Seed Company www.territorialseed.com Specializes in wide variety of vegetable seeds |
Deer Deterrent Tips by Christine Petersen
My deer deterrent regimen is pretty simple. First, I put Milorganite around
all the hostas, lilium, phlox, echinaceas and daylilies. Milorganite is a
brand of fertilizer produced by treating sewage sludge. It is composed of
the microbes that ate the waste, not the waste itself. Sounds absolutely
disgusting, I know, but after processing, all the pathogens are killed and
it is dried and pelletized. The deer don't like the smell of Milorganite.
Next, I start spraying with Liquid Fence. I spray all the foliage of the
plants that deer favor. When the daylilies start budding up, I concentrate
on their buds. I spray often, maybe every two weeks, especially after heavy
rainfall.
What has made my spray program easier is a battery operated sprayer. I can't
do without it.